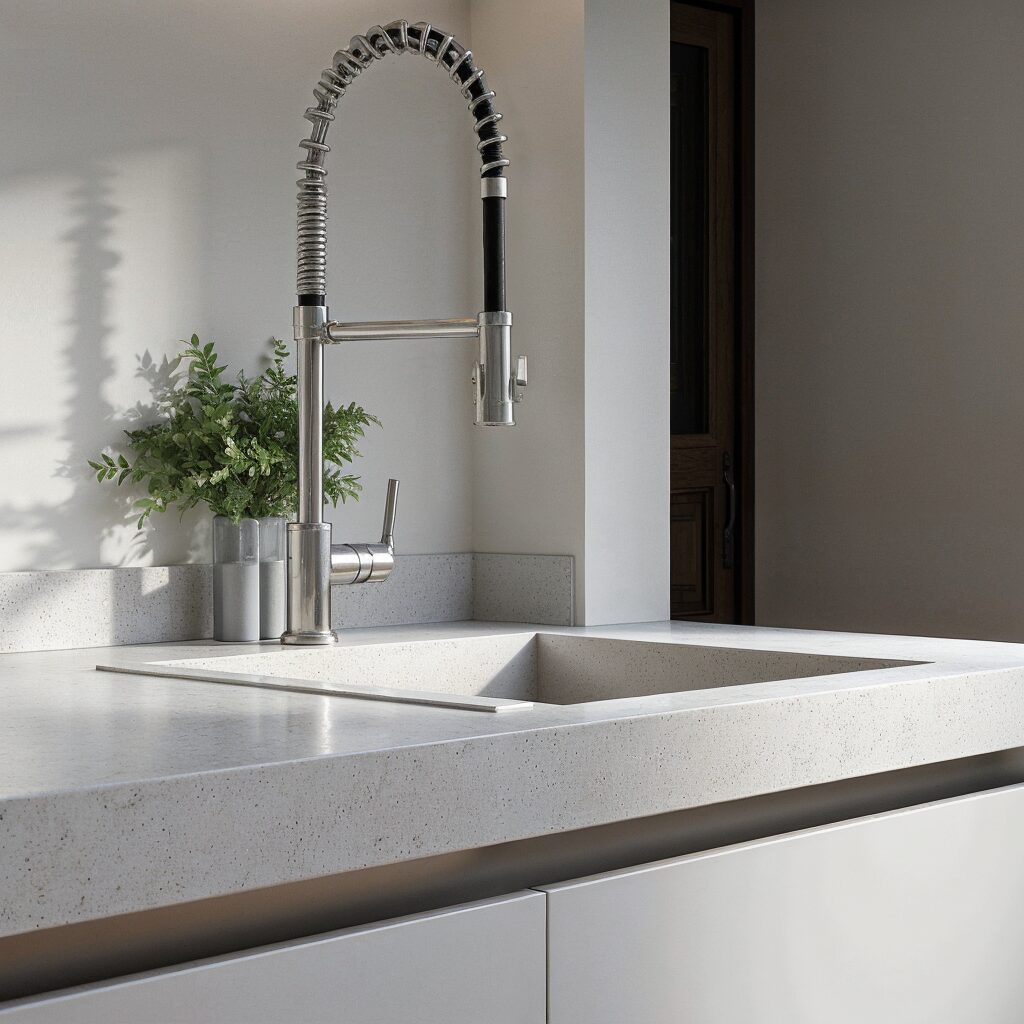
Modern kitchen sink with cleanly sealed edges using silicone sealant for a waterproof finish.

Top 10 Benefits of Silicone Sealant for Home and Commercial Use

Silicone sealants are indispensable for sealing, bonding, and protecting surfaces in a wide range of applications. Whether you’re working on a home improvement project or a large-scale commercial task, silicone sealants offer unmatched versatility, durability, and long-lasting performance.

In this guide, we’ll explore the top 10 benefits of silicone sealants, share expert application tips, and highlight why they remain a top choice for professionals and DIY enthusiasts alike.

Why Silicone Sealants Matter

Modern kitchen sink with cleanly sealed edges using silicone sealant for a waterproof finish.

Silicone sealants stand out due to their unique properties, such as superior adhesion, flexibility, and resistance to extreme conditions. These qualities make them ideal for waterproofing, weatherproofing, and enhancing structural integrity.

💡 Pro Tip: When choosing a silicone sealant, consider the specific needs of your project. For example, opt for UV-resistant silicone sealants for outdoor use or mold-resistant options for bathrooms.

1. Waterproofing Excellence

Stainless steel kitchen sink with sealed edges using silicone sealant for water resistance and durability.

One of the most notable benefits of silicone sealants is their ability to create a watertight barrier. This makes them the go-to choice for areas exposed to moisture, such as kitchens, bathrooms, and outdoor spaces.

Applications:

  • Sealing sinks, bathtubs, and shower enclosures.
  • Preventing water leaks in roofs and gutters.

Recommended Product:

🔗 Related Blog: How to Maintain and Extend the Life of Silicone Sealants

2. Flexibility for Material Movement

Silicone sealants remain elastic after curing, accommodating natural expansion and contraction of materials. This flexibility prevents cracking or breaking, ensuring the longevity of the seal.

Best For:

  • Window frames that expand in hot weather.
  • Sealing joints in areas with temperature fluctuations.
  • 💡 Expert Tip: Always apply a thin, consistent bead for optimal flexibility and bonding.

3. Extreme Temperature Resistance

Silicone sealants are designed to endure a wide temperature range, making them suitable for both freezing and high-heat environments.

Applications:

  • Automotive repairs, such as sealing windshields and engine parts.
  • Industrial equipment and ovens.

4. Mold and Mildew Resistance

In damp environments, such as bathrooms and kitchens, mold-resistant silicone sealants help maintain a hygienic and visually appealing finish.

Best For:

Shower enclosures, countertops, and backsplashes.

Product Highlight:

🔗 Related Blog: How to Choose the Best Silicone Sealant for Any Project

5. UV and Weather Resistance

Window edges sealed with silicone sealant for weatherproofing and preventing drafts.

Outdoor projects demand materials that can withstand harsh environmental conditions. Silicone sealants are formulated to resist UV rays, rain, and extreme weather.

Applications:

Weatherproofing windows, roofs, and siding.
🔗 External Resource: ToolStation’s Sealant Buying Guide

6. Long-Lasting Durability

With proper application and maintenance, silicone sealants can last 10–20 years. Their resistance to wear, cracking, and environmental factors ensures minimal upkeep.

💡 Maintenance Tip: Inspect silicone seals annually and reapply as needed to maximize their lifespan.

7. Strong Adhesion to Various Materials

Silicone sealants adhere to a wide range of materials, including glass, metal, wood, and plastic. This versatility makes them suitable for diverse applications.

  • Examples:
    • Sealing glass panels in a greenhouse.
    • Repairing wooden furniture joints.

8. Easy to Apply

A person applying sealant to a window frame using a caulking gun, with a view of green trees through the glass.

Silicone sealants are user-friendly, making them accessible for DIY projects and professional jobs alike. With the right tools, achieving a seamless finish is easy.

  • Tools You’ll Need:
    • High-quality caulking gun for even application.
    • Smoothing tool or damp cloth for finishing.

9. Cost-Effective Solution

Though silicone sealants may have a higher initial cost, their durability and effectiveness save money in the long run by reducing the need for frequent repairs or replacements.

  • Case Study: Sealing drafty windows with silicone sealant improves energy efficiency, lowering heating and cooling costs.

10. Safe for Sensitive Surfaces

Neutral-cure silicone sealants are ideal for materials that may corrode with acidic products, such as metal and marble.

  • Best For: Construction projects and automotive applications involving sensitive materials.

Common Mistakes to Avoid

Even the best silicone sealants can fail if applied incorrectly. Avoid these common errors:

  1. Skipping Surface Preparation: Clean and dry surfaces thoroughly before application to ensure strong adhesion.
  2. Using the Wrong Product: Always match the sealant to your project’s needs (e.g., mold-resistant for bathrooms).
  3. Rushing the Curing Process: Allow adequate curing time, typically 24–48 hours, for a strong and lasting seal.

🔗 Related Blog: Top Mistakes to Avoid When Applying Silicone Sealant

FAQs About Silicone Sealants

Q: Can silicone sealants be painted?
A: No, silicone sealants are not paintable. Use acrylic or hybrid sealants for painted finishes.

Q: How do I remove old silicone sealant?
A: Use a silicone remover or utility knife to scrape off old residue. Clean the surface with rubbing alcohol before reapplying.

Q: How long do silicone sealants last?
A: High-quality silicone sealants can last 10–20 years with proper maintenance.

Conclusion

Silicone sealants are a versatile and reliable solution for a wide range of home and commercial projects. Their waterproofing capabilities, flexibility, and long-lasting performance make them an essential tool for professionals and DIY enthusiasts alike.

🚀 Ready to elevate your projects? Explore our Silicone Sealant Collection for premium products designed to deliver exceptional results.
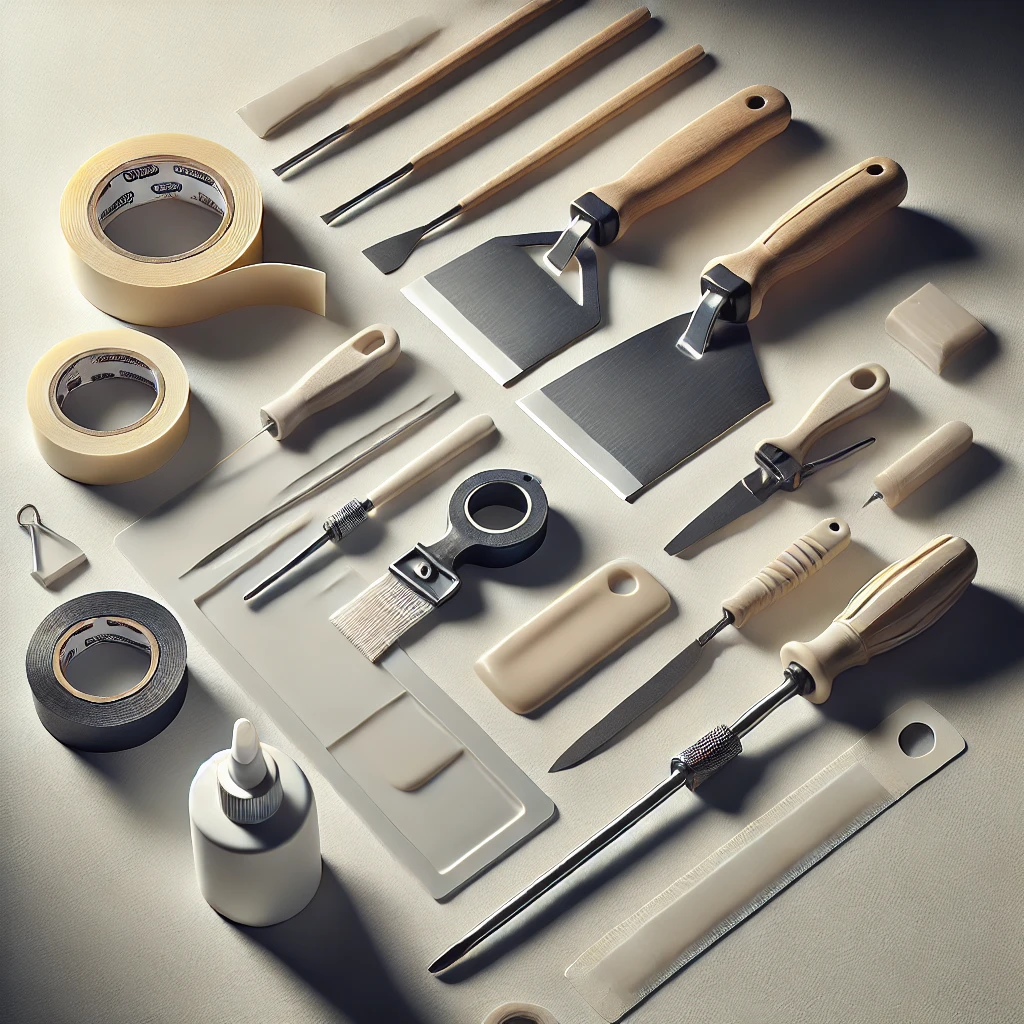
A neatly arranged set of tools for sealing, including a scraper, silicone remover, masking tape, and other related accessories, organized for efficient application.

The Ultimate Guide to Silicone Sealants: Tips for Long-Lasting Results

Silicone sealants are essential for sealing, bonding, and protecting surfaces in bathrooms, kitchens, and outdoor spaces. With their unmatched waterproofing, flexibility, and durability, they are the go-to solution for both DIYers and professionals. However, achieving long-lasting results depends on selecting the right sealant, applying it properly, and maintaining it over time.

In this guide, we’ll explore everything you need to know about silicone sealants, including choosing the best product for your project, application techniques, and expert tips for extending their lifespan.

A clean and polished bathtub with silicone-sealed edges in a modern bathroom, emphasizing waterproofing and durability.

Why Silicone Sealants Are Essential for Any Project

Silicone sealants offer several benefits that make them indispensable for various applications:

Key Benefits:

Sunlight streaming through sealed glass windows, showcasing the clean and weatherproof finish provided by silicone sealant.
  • Waterproofing: Keeps surfaces protected from moisture, mold, and mildew.
  • Durability: Resists UV rays, extreme temperatures, and wear and tear.
  • Flexibility: Adapts to material movements without cracking or losing adhesion.
  • Versatility: Suitable for kitchens, bathrooms, outdoor projects, automotive repairs, and more.

💡 Pro Tip: For outdoor projects, always choose UV-resistant silicone sealants to ensure they withstand sun exposure and extreme weather conditions.

 Learn more about Top Mistakes to Avoid When Applying Silicone Sealants.

How to Choose the Right Silicone Sealant

Selecting the right silicone sealant is crucial for achieving professional results. Here’s what to consider:

1. Application Area

Modern kitchen with sealed countertops and backsplash, highlighting the use of silicone sealant for a waterproof and durable finish.
  • Bathrooms and Kitchens: Use mold-resistant silicone sealants like OPTIMUS Waterproof Silicone Sealant to prevent mildew and ensure durability in high-moisture areas.
  • Outdoor Projects: For windows, roofs, and siding, select UV-resistant silicone sealants that can handle harsh weather.
  • Automotive and Industrial: Use high-temperature silicone sealants for engine repairs or heavy-duty equipment.

 Dive deeper into product recommendations in our Complete Guide to Silicone Sealants.

Well-sealed outdoor patio door with sunlight streaming through, highlighting seamless silicone application along the edges.

2. Material Compatibility

  • Acid-Cure Silicone Sealants:
    • Best for glass, ceramic, and other non-porous surfaces.
    • Avoid using on metals as they may corrode.
  • Neutral-Cure Silicone Sealants:
    • Ideal for sensitive materials like aluminum, marble, or concrete.
    • Perfect for construction and automotive use.

3. Environmental Conditions

Sealants need to be tailored to the environment:

  • High Moisture: Bathrooms and kitchens need waterproof, mold-resistant products.
  • UV Exposure: Outdoor sealants should resist cracking and discoloration from sunlight.
  • Extreme Temperatures: Use heat-resistant sealants for ovens, stovetops, or areas prone to freezing.

💡 Pro Tip: Match your sealant to the material and environment for optimal results.

Step-by-Step Guide to Applying Silicone Sealants

1. Prepare the Surface

  • Clean Thoroughly: Remove old sealant, dirt, grease, and debris.
  • Dry Completely: Moisture can compromise adhesion.

2. Apply the Sealant

  • Cut the nozzle at a 45-degree angle for precise application.
  • Use a high-quality caulking gun for even flow.
  • Apply a consistent bead along the joint or seam.

3. Smooth and Finish

Close-up of a caulking tool smoothing a bead of silicone sealant on a tiled surface for precise and professional sealing.
  • Use a caulking tool or damp finger to smooth the bead.
  • Work quickly before the sealant begins to cure.

4. Allow Proper Curing Time

  • Follow the manufacturer’s instructions—typically 24 to 48 hours.
  • Avoid moisture, stress, or physical contact during this period.

Common Mistakes to Avoid

1. Skipping Surface Preparation

  • Problem: Dirt and grease reduce adhesion.
  • Solution: Clean thoroughly with rubbing alcohol or acetone.

2. Using the Wrong Sealant

  • Problem: Standard silicone fails in high-moisture or UV-exposed areas.
  • Solution: Use waterproof or UV-resistant sealants as needed.

3. Rushing the Application

  • Problem: Uneven beads or incomplete coverage.
  • Solution: Work in small sections for precision.

FAQs About Silicone Sealants

A neatly arranged set of tools for sealing, including a scraper, silicone remover, masking tape, and other related accessories, organized for efficient application.

No, silicone sealants are not paintable. Use an acrylic or hybrid sealant for a painted finish.

High-quality silicone sealants can last 10–20 years with proper application and maintenance.

Use a silicone remover or a utility knife to scrape off residue, then clean the surface with rubbing alcohol.

🔗 External Link: For additional product advice, visit ToolStation’s Sealant Buying Guide.

Tips for Maintaining Silicone Sealants

  • Regular Cleaning: Clean sealant lines with mild soap and water to prevent dirt buildup and mold growth.
  • Inspect Regularly: Check for cracks, discoloration, or peeling, especially in outdoor applications.
  • Reapply When Necessary: Remove failing sealant entirely before applying a fresh layer.

Conclusion

Silicone sealants are indispensable for projects ranging from waterproofing bathrooms to sealing outdoor windows. By choosing the right product, following proper application techniques, and maintaining the sealant over time, you can ensure long-lasting, professional results.

💡 CTA: Ready to get started? Browse our Silicone Sealant Collection for premium products designed to meet your project’s needs!

A clean and organized workspace displaying unbranded silicone sealant tubes arranged neatly, each differentiated by color, alongside tools like a caulking gun, scraper, and masking tape, with a bright natural lighting setup emphasizing functionality and professionalism.

How to Choose the Best Silicone Sealant for Any Project (Pro Tips Included)

Introduction

Selecting the best silicone sealant for your project can be the difference between a durable, long-lasting finish and a frustrating, costly repair. Whether you’re sealing a bathroom, weatherproofing outdoor fixtures, or tackling industrial applications, understanding the types of silicone sealants available and their properties is essential.

In this guide, we’ll cover everything from choosing the right sealant for specific environments to expert application tips and product recommendations. Get ready to achieve professional results with confidence.

Why Choosing the Right Silicone Sealant Matters

Close-up of a cleanly sealed edge on a bathroom sink, showcasing a smooth and professional silicone sealant application.

Risks of Using the Wrong Sealant

Using the wrong silicone sealant for a project can lead to a host of issues:

  1. Cracking and Peeling: Inadequate sealants in high-moisture areas, such as bathrooms, can crack or peel prematurely.
  2. Weak Bonds: Using a sealant incompatible with the material can result in poor adhesion or even corrosion.
  3. Shortened Lifespan: A non-UV-resistant sealant used outdoors may degrade quickly under sunlight.

How the Best Silicone Sealant Can Transform Your Project

  • Enhanced Longevity: High-quality silicone sealants can last 10–20 years, reducing the need for repairs.
  • Professional Aesthetics: Achieve smooth, seamless finishes for any surface.
  • Maximum Protection: Protects against water leaks, mold growth, and structural damage.

💡 Pro Tip: Always choose mold-resistant silicone for bathrooms and UV-resistant silicone for outdoor applications like siding or windows.

Key Factors to Consider When Choosing the Best Silicone Sealant

1. Purpose of Application

Every project requires a tailored solution:

  • Bathrooms and Kitchens: Opt for waterproof and mold-resistant silicone sealants to handle constant moisture.
  • Outdoor Use: Use UV-resistant sealants to prevent cracking and discoloration under sunlight.
  • Specialized Applications: High-temperature silicone sealants are ideal for ovens, automotive parts, and industrial equipment.

🔗 Related Blog: Discover the Top 7 Applications of Silicone Sealants to see how silicone sealants excel in different scenarios.

2. Material Compatibility

The material you’re sealing plays a major role in selecting the right product:

  • Acid-Cure Silicone Sealants: Best for glass and ceramic but can corrode metals.
  • Neutral-Cure Silicone Sealants: Ideal for metals, concrete, and sensitive materials like marble or aluminum.

💡 Pro Tip: Always test the sealant on a small, inconspicuous area to ensure compatibility.

3. Environmental Conditions

Some environments demand specialized silicone formulations:

  • Moisture-Prone Areas: Bathrooms and kitchens need mold-resistant products like OPTIMUS Waterproof Silicone Sealant.
  • UV-Exposed Surfaces: Outdoor sealants, such as EverShield UV-Resistant Silicone Sealant, ensure durability against sunlight.
  • Extreme Heat or Cold: High-temperature sealants are essential for applications like sealing stovetops or automotive windshields.

4. Longevity and Maintenance

While premium silicone sealants may cost more initially, they save time and money in the long run with reduced maintenance needs and longer lifespans.

Top Types of the Best Silicone Sealants

1. Multi-Purpose Silicone Sealants

These versatile products work well for general household projects, from sealing gaps to minor repairs.

Applications: Windows, doors, and small DIY projects.
Recommended Product: AutoStar Germany Multi-Purpose Silicone Sealant – Provides excellent adhesion on glass, metal, and wood.

2. Waterproof Silicone Sealants

Wide-angle view of a bathroom showcasing a glossy bathtub or shower area with perfectly sealed edges using silicone sealant under bright lighting.

Perfect for high-moisture environments, these sealants prevent mold and water infiltration.

Applications: Bathrooms, kitchens, and laundry rooms.
Recommended Product: OPTIMUS Waterproof Silicone Sealant – Ensures a long-lasting seal resistant to moisture and mold.

3. UV-Resistant Silicone Sealants

Wide-angle shot of patio doors with clear glass, sunlight streaming through, seamlessly sealed edges with silicone sealant for a polished finish.

Designed to withstand sunlight and weather exposure, making them ideal for outdoor projects.

Applications: Siding, roofing, and outdoor furniture.

4. High-Temperature Silicone Sealants

Close-up view of sealed joints in an automotive engine showcasing the precise application of silicone sealant, highlighting smooth and professional sealing.

These specialized products are engineered for applications exposed to extreme heat.

Applications: Ovens, engines, and industrial machinery.
Recommended Product: Geocel High-Temperature Silicone Sealant – Withstands temperatures up to 400°F (204°C).

How to Apply the Best Silicone Sealant for Optimal Results

A neatly arranged set of tools for sealing, including a scraper, silicone remover, masking tape, and other related accessories, organized for efficient application.

Step 1: Surface Preparation

  • Remove old sealant using a silicone remover or utility knife.
  • Clean the surface thoroughly with rubbing alcohol or acetone to eliminate dirt and grease.

Step 2: Application

  • Cut the nozzle at a 45-degree angle for precise application.
  • Use a caulking gun to apply the sealant evenly along the seam.

Step 3: Smoothing the Seal

Smooth the bead using a caulking tool or a damp finger for a clean, professional finish.

Step 4: Curing

  • Allow the sealant to cure for 24–48 hours as per the manufacturer’s guidelines.
  • Avoid exposing the sealant to water or stress during this period.

💡 Pro Tip: Work in small sections to ensure even application and avoid rushed results.

Common Mistakes to Avoid

1. Skipping Surface Preparation

Dirt, moisture, or old sealant residue can weaken adhesion and cause premature failure.

2. Using the Wrong Sealant

Always match the sealant to the project’s requirements. For instance, avoid using general-purpose sealant in high-moisture or UV-exposed areas.

3. Ignoring Manufacturer Guidelines

Sealants require specific curing times and application conditions to perform optimally.

🔗 Related Blog: Avoid these errors with our Mistakes to Avoid When Applying Silicone Sealants guide.

Frequently Asked Questions (FAQ)

High-quality silicone sealants can last between 10–20 years, depending on the environment and maintenance.

No, silicone sealants are not paintable. Use an acrylic or hybrid sealant for painted finishes.

UV-resistant options like EverShield UV-Resistant Silicone Sealant are ideal for outdoor projects.

Use a silicone remover or utility knife to scrape away old sealant. Clean the surface with rubbing alcohol before reapplying.

Conclusion

Choosing the best silicone sealant for your project ensures long-lasting, professional-grade results. Whether you’re waterproofing a bathroom, sealing outdoor fixtures, or tackling industrial repairs, matching the product to your needs is key.

💡 Start Your Project Right: Explore our Silicone Sealant Collection for premium products or discover expert advice in our Top 7 Applications of Silicone Sealants blog.

A collection of various silicone sealant tubes and application tools arranged neatly on a white surface, showcasing products for diverse sealing applications.

Silicone Sealants vs. Acrylic Sealants: Which One Should You Choose?

Silicone Sealants vs Acrylic Sealants is a decision many DIY enthusiasts and professionals face. Choosing the right sealant is a crucial step in ensuring the durability, appearance, and performance of any project. Sealants play a key role in filling gaps, waterproofing surfaces, and providing flexibility to structures, but not all sealants are created equal. Two of the most commonly used types—silicone sealants and acrylic sealants—each have distinct properties that make them suitable for different applications.

So, which one is right for your project? In this comprehensive guide, we’ll explore the key differences between silicone and acrylic sealants, outline their benefits and drawbacks, and help you make an informed decision.

What Are Silicone Sealants?

Close-up of a neatly sealed trim using acrylic sealant, showcasing its paintable finish and smooth application.

Silicone sealants are high-performance products designed to create long-lasting, flexible seals. Their unique properties make them an ideal choice for wet environments, outdoor applications, and areas exposed to temperature fluctuations or material movement.

Key Features of Silicone Sealants

  • Flexibility: Silicone sealants retain their elasticity even after curing, allowing them to accommodate structural movement without cracking.
  • Water Resistance: Silicone sealants are fully waterproof, making them ideal for applications where exposure to water or moisture is unavoidable.
  • Temperature Tolerance: These sealants perform well in extreme temperatures, ranging from -40°F to 400°F (-40°C to 204°C).
  • UV Resistance: Unlike some other sealants, silicone can withstand prolonged exposure to sunlight without degrading.
  • Longevity: With proper application, silicone sealants can last 10–20 years.

Common Uses for Silicone Sealants

  • Bathroom and Kitchen Sealing: Perfect for sinks, bathtubs, showers, and countertops, where mold and moisture resistance are crucial.
  • Weatherproofing: Silicone sealants excel in sealing windows, doors, roofs, and gutters, protecting against rain, wind, and UV exposure.
  • Automotive Applications: Frequently used in windshields, headlights, and body joints due to their durability and ability to handle vibrations.

💡 External Resource: For more on silicone sealants, check out Toolstation’s Sealant Buying Guide.

What Are Acrylic Sealants?

Close-up of crown molding with a smooth, paintable finish, showcasing the seamless application of acrylic sealant in trim work.

Acrylic sealants, on the other hand, are primarily used for indoor applications where a paintable finish is required. While they are easier to apply and less expensive, their performance is limited in areas exposed to moisture or movement.

Key Features of Acrylic Sealants

  • Paintable: Acrylic sealants can be easily painted to match surrounding décor, making them ideal for visible joints in trim work or drywall.
  • Ease of Application: These sealants are beginner-friendly, as they dry quickly and are simple to smooth.
  • Limited Flexibility: Acrylic sealants tend to become brittle over time, leading to cracks in areas subject to movement.
  • Low Durability: They lack water resistance and UV protection, making them unsuitable for wet environments or outdoor use.

Common Uses for Acrylic Sealants

  • Interior Trim Work: Perfect for filling gaps in baseboards, crown molding, and other decorative elements.
  • Drywall Repair: Commonly used to seal small cracks or joints in walls.
  • Low-Moisture Areas: Works well in spaces that aren’t exposed to water, such as living rooms or bedrooms.

Silicone vs. Acrylic Sealants: Head-to-Head Comparison

FeatureSilicone SealantAcrylic Sealant
Water ResistanceFully waterproof; ideal for kitchens and bathrooms.Not water-resistant; unsuitable for wet areas.
DurabilityLong-lasting; resistant to UV light and extreme temperatures.Short lifespan; prone to cracking over time.
FlexibilityRetains elasticity after curing; handles movement well.Rigid and inflexible; cracks under stress.
PaintabilityNot paintable but comes in various colors.Fully paintable for aesthetic matching.
Outdoor UsePerfect for sealing projects exposed to weather.Limited to indoor use in dry areas.
Ease of ApplicationRequires careful technique and tools for precision.Beginner-friendly and dries quickly.

Why Silicone Sealants Are Often the Better Choice

Although acrylic sealants have their strengths, particularly for indoor projects requiring a painted finish, silicone sealants offer greater durability, flexibility, and water resistance. This makes silicone sealants the superior option for high-moisture areas, outdoor applications, and environments with temperature or structural movement.

Advantages of Silicone Sealants Over Acrylic

  1. Better Moisture Protection: Silicone is completely waterproof, making it the go-to choice for bathrooms, kitchens, and outdoor projects.
  2. Longer Lifespan: Silicone sealants last significantly longer, often exceeding 10 years with proper application.
  3. Weather Resistance: Silicone is unaffected by UV rays or extreme temperatures, making it ideal for outdoor use.
  4. Superior Flexibility: Unlike acrylic, silicone can handle joint movement without cracking, making it a better option for areas prone to expansion or vibration.

When to Use Acrylic Sealants Instead

Choose acrylic sealants when:

  • A paintable finish is required to match existing décor.
  • The area is dry and not exposed to significant moisture or stress.
  • You need an inexpensive option for small interior projects.

Top Applications for Silicone Sealants

1. Bathroom and Kitchen Sealing

Modern bathroom with a frameless glass shower and floating vanity, highlighting areas ideal for silicone sealant application.

Moisture is unavoidable in bathrooms and kitchens, making silicone sealants essential for these spaces. Their mold resistance ensures clean and hygienic results over time.

Recommended Product:

OPTIMUS Waterproof Silicone Sealant: Designed to resist mold and mildew, it’s perfect for sinks, bathtubs, and countertops.

2. Outdoor Weatherproofing

For sealing windows, doors, gutters, and roofs, silicone sealants provide unmatched protection against rain, wind, and UV exposure.

Recommended Product:

AutoStar Germany Multi-Purpose Silicone Sealant: Ideal for outdoor applications, offering superior durability in harsh weather conditions.

Discover tips on weatherproofing with our Guide to Silicone Sealants for Outdoor Use.

3. Automotive Applications

Close-up of a car windshield sealed with silicone sealant, showcasing durability and precision for automotive applications

Silicone sealants are a top choice for the automotive industry, where vibration and temperature changes are common. They provide strong, flexible bonds for windshields, headlights, and more.

Recommended Product:

AutoStar Germany Windscreen Glass Sealant: A high-performance option specifically designed for automotive use.

Check out our Top 7 Applications of Silicone Sealants for more inspiration.

How to Use Silicone Sealants Like a Pro

Preparing a surface for silicone sealant application by cleaning it with a cloth.

1. Surface Preparation is Key

Clean the surface thoroughly to remove dirt, grease, and old sealant. Silicone adheres best to smooth, dry surfaces.

2. Choose the Right Tools

Invest in a high-quality caulking gun to ensure precise application and smooth, consistent beads.

3. Apply in Small Sections

Silicone sealant begins to cure as soon as it’s exposed to air, so work in manageable sections to avoid rushed application.

4. Smooth Immediately

Use a caulking tool or damp finger to smooth the bead before it sets. This ensures a neat and professional finish.

5. Allow Proper Curing Time

Follow the manufacturer’s instructions for curing, typically 24–48 hours. Avoid touching or exposing the sealant to water during this period.

FAQs About Silicone Sealants vs. Acrylic Sealants

No, silicone sealants cannot be painted. If a painted finish is necessary, choose an acrylic or hybrid sealant.

No, acrylic sealants lack water resistance and are unsuitable for wet environments.

With proper application, silicone sealants can last 10–20 years, depending on environmental conditions.

Silicone sealants are better for outdoor use due to their weather resistance and UV protection.

Conclusion: Which Sealant Should You Choose?

When it comes to durability, flexibility, and water resistance, silicone sealants outperform acrylic sealants in almost every category. Whether you’re working on a bathroom renovation, sealing windows and doors, or tackling an automotive project, silicone sealants provide the longevity and reliability you need.

However, for indoor projects requiring a paintable finish, acrylic sealants remain a cost-effective and practical option.

💡 Ready to get started? Explore our Silicone Sealant Collection for high-quality products tailored to your needs, or contact us for expert advice on choosing the right sealant for your project!

Messy silicone sealant application showing uneven and excessive use.

Avoid These Common Mistakes When Applying Silicone Sealant for a Professional Finish

Silicone sealant is a versatile solution for sealing gaps, waterproofing surfaces, and enhancing durability in areas like bathrooms, kitchens, and outdoor projects. Its flexibility, water resistance, and longevity make it indispensable for both DIY enthusiasts and professionals. However, improper application of silicone sealant can lead to uneven finishes, poor adhesion, or premature failure.

This guide highlights common mistakes when applying silicone sealant and offers expert tips to help you achieve a professional, long-lasting finish.

Common Mistakes When Applying Silicone Sealant

1. Why Surface Preparation is the Key to Long-Lasting Seals

Preparing a surface for silicone sealant application by cleaning it with a cloth.

Proper surface preparation is critical to achieving a strong bond and a smooth finish. Skipping this step often results in poor adhesion and early failure of the seal.

The Problem:

  • Dirt, grease, or moisture prevents the sealant from sticking effectively.
  • Residue or debris weakens the seal over time, leading to cracks or peeling.

The Solution:

  • Clean Thoroughly: Use rubbing alcohol, acetone, or an appropriate cleaner to remove all contaminants.
  • Dry Completely: Ensure the surface is moisture-free before application, as even small traces of water can interfere with adhesion.

💡 Pro Tip: High-humidity areas, like bathrooms, require extra attention during preparation. Use a fan or dehumidifier to ensure surfaces are fully dry before sealing.

2. How to Choose the Perfect Silicone Sealant for Every Job

Using the wrong type of silicone sealant can compromise its effectiveness. Each sealant type is designed for specific materials and conditions.

The Problem:

  • General-purpose sealants may fail in high-temperature environments or mold-prone areas.
  • Certain surfaces, like metal or porous materials, may require specialized products to prevent damage or ensure longevity.

The Solution:

  • Match the Sealant to Your Task:
    • Acid-Cure Silicone: Perfect for non-porous surfaces like glass. Avoid using on sensitive materials like metal.
    • Neutral-Cure Silicone: Suitable for metals, concrete, and other porous materials as it prevents corrosion.
    • Specialty Silicone Sealants: Use mold-resistant options for bathrooms or UV-resistant sealants for outdoor projects.

💡 Tip: For more information on silicone sealant properties, explore this guide from RS about different types of sealants and their uses.

3. Avoid These Common Mistakes with Silicone Application Techniques

Messy silicone sealant application showing uneven and excessive use.

Even the best silicone sealant can deliver subpar results when applied incorrectly. Poor technique often leads to wasted product, messy finishes, and weakened seals.

The Problem:

  • Uneven beads or excessive sealant application cause gaps or waste.
  • Neglecting to smooth the sealant results in rough edges or incomplete sealing.

The Solution:

  • Use a High-Quality Caulking Gun: Ensures consistent flow and better control.
  • Apply a Thin, Even Bead: Avoid over-applying for a neater finish and faster curing.
  • Smooth Immediately: Use a dampened finger or a caulking tool to smooth the bead before it begins to set.

💡 Pro Tip: For detailed guidance, explore Top 5 Essential Tips for Applying Silicone Sealant Like a Pro for step-by-step advice.

4. Why Ignoring Curing Times Can Ruin Your Seal

Rushing the curing process is a critical error that can weaken the seal. Patience is essential to ensure the sealant bonds properly and achieves maximum durability.

 The Problem:

    • Premature exposure to water, dust, or movement disrupts curing.
    • Many users assume the sealant is ready within hours, but full curing often requires days.

The Solution:

  • Follow Manufacturer Guidelines: Allow the sealant to cure for 24–48 hours as recommended.
  • Protect During Curing: Prevent exposure to moisture, dust, or vibration during this period.

💡 Tip: For more tips, check out  Silicone Sealant Lifespan: How to Make It Last Longer to learn about curing best practices.

Tips for Successful Silicone Sealant Application

A person using a caulking gun to apply silicone sealant precisely along the edges of a surface.

1. Use Masking Tape for Precision

Place masking tape along the edges of the joint to create clean lines. Remove the tape immediately after smoothing the sealant for a neat finish.

2. Invest in Quality Tools

A good caulking gun and smoothing tool can simplify the process, improve control, and enhance the final result.

3. Work in Manageable Sections

Since silicone sealant starts curing as soon as it’s exposed to air, tackle small sections at a time to avoid rushed application.

4. Practice on a Scrap Surface

If you’re new to applying sealant, practice on a scrap surface to get comfortable with the flow and pressure required for an even bead.

5. Follow Safety Guidelines

Work in a well-ventilated area to avoid inhaling fumes. Wear gloves to protect your hands from prolonged exposure to the sealant.

FAQs About Applying Silicone Sealant

Ensure the surface is clean, dry, and free of grease. A swipe with rubbing alcohol will confirm cleanliness.

Most silicone sealants aren’t paintable. If a painted finish is required, opt for paintable silicone products.

When applied correctly, silicone sealants can last 5–10 years, depending on the environment and maintenance.

Yes! Use a silicone remover or utility knife to scrape off old sealant, then clean and prepare the surface before reapplying.

Conclusion

Applying silicone sealant like a pro involves more than just squeezing it out of a tube. By avoiding common mistakes—like neglecting surface preparation, selecting the wrong sealant, or rushing curing—you can achieve a professional finish that lasts.

💡 Ready to get started? Explore our premium Silicone Sealant Collection to find the perfect product for your project, and check out more resources to master your technique.

AutoStar Germany Multi-Purpose Silicone Sealant tube designed for indoor and outdoor applications with durable, long-lasting performance.

Silicone Sealant Lifespan: 10 Tips for Long-Lasting Durability

Silicone sealants are essential in a variety of projects, from waterproofing bathrooms to sealing outdoor structures. While these sealants are highly durable, their longevity depends on how they are stored, applied, and maintained. Understanding silicone sealant lifespan is key to maximizing its effectiveness and ensuring it delivers the long-lasting results you expect.

In this guide, we’ll explore how long silicone sealants last in different conditions, how to extend their lifespan, and common issues to avoid. Whether you’re a DIY enthusiast or a professional, these tips will help you get the most out of your sealant.

How Long Does Silicone Sealant Last in the Tube?

When stored correctly, silicone sealants can maintain their quality for about one year in an unopened tube. Some high-quality silicone sealants might last longer, but it’s essential to check the expiration date printed on the packaging.

Close-up of improperly applied silicone sealant showing a lumpy, uneven, and discolored surface due to poor storage conditions.

Factors That Affect Shelf Life

  1. Storage Conditions: Silicone sealants should be stored in a cool, dry place, away from direct sunlight or high temperatures. Heat can degrade the material and shorten its shelf life.
  2. Tube Integrity: Keep the sealant tube sealed tightly. Exposure to air can cause premature curing, rendering the product unusable.

Pro Tips for Storing Silicone Sealants

  • Store the tube upright to prevent blockages in the nozzle.
  • Avoid freezing temperatures, as this can alter the composition of the sealant.
  • Check the tube regularly for any signs of hardening or cracks.

How Long Does Silicone Sealant Last After Application?

Once applied, silicone sealants can last anywhere from 10 to 20 years, depending on the environment and maintenance. Indoor applications generally last longer than outdoor ones due to less exposure to harsh elements.

Close-up of a window frame sealed with silicone sealant, highlighting proper application for weatherproofing and durability.

Factors That Impact Longevity

  1. Exposure to Weather:
  • Outdoor silicone sealants face extreme temperatures, UV rays, and rain. Prolonged exposure to these elements can degrade the sealant over time.
  • High temperatures may cause the sealant to lose its elasticity, while freezing conditions can lead to cracks.

    2. Surface Preparation:
    A poorly cleaned or improperly prepared surface can weaken the bond and reduce durability.

    3. Maintenance:
    Regular inspections and cleaning can help preserve the integrity of the seal.

    Check out our Guide to Silicone Sealants for Different Applications to learn how to choose the right sealant for outdoor or indoor use.

How to Maximize Silicone Sealant Lifespan

A step-by-step process of applying silicone sealant, showing surface preparation, sealant application, and smoothing for a professional finish.

The key to ensuring a long-lasting seal lies in proper application, storage, and maintenance. Follow these expert tips to extend the lifespan of your silicone sealant:

1. Proper Storage

  • Store in a Cool, Dry Place: Keeping the sealant away from heat and humidity will prevent premature curing.
  • Check Expiration Dates: Always verify the tube’s shelf life before use to ensure optimal performance.

2. Surface Preparation

  • Clean the surface thoroughly, removing dust, grease, and old sealant.
  • Use a primer designed for silicone sealants to improve adhesion, especially on non-porous surfaces like glass and metal.

3. Apply in the Right Conditions

  • Ideal application temperature: Between +5°C and +35°C.
  • Avoid applying sealant in damp or rainy conditions, as moisture can interfere with curing.

4. Use High-Quality Products

Invest in professional-grade silicone sealants, such as:

5. Regular Maintenance

  • Inspect seals periodically for cracks, peeling, or discoloration.
  • Clean with a mild detergent and a soft cloth to prevent mold or dirt buildup.
  • Reapply sealant if you notice any signs of wear and tear.

Common Silicone Sealant Problems and Solutions

Despite its durability, silicone sealant can sometimes fail. Here are common issues and how to fix them:

Problem 1: Peeling or Cracking

  • Cause: Poor surface preparation or exposure to extreme weather.
  • Solution: Remove the damaged sealant, clean the surface, and reapply a fresh layer.

Problem 2: Mold Growth

Close-up of mold growth on silicone sealant in a high-moisture area, such as around the edge of a bathtub or sink, highlighting improper maintenance.
  • Cause: Prolonged exposure to moisture without proper cleaning.
  • Solution: Use a mold-resistant product like OPTIMUS Waterproof Silicone Sealant and clean regularly with an antibacterial solution.

Problem 3: Air Bubbles During Application

  • Cause: Improper application technique.
  • Solution: Apply steady pressure with a caulking gun to ensure a smooth, bubble-free seal.

FAQs: Silicone Sealant Lifespan

Silicone sealant applied indoors can last up to 20 years if properly maintained and protected from harsh conditions.

Yes, unopened tubes typically last for about 1 year. Always check the expiration date before use.

Use a mild detergent and a soft cloth to gently clean the surface. Avoid abrasive cleaners, which can damage the seal.

Most silicone sealants are not paintable. If painting is required, choose a product specifically labeled as paintable.

Why Choose High-Quality Silicone Sealants?

Using high-quality products ensures longer-lasting results. Professional-grade silicone sealants offer better adhesion, UV resistance, and durability compared to cheaper alternatives.

Recommended Products

Browse our Silicone Sealant Collection to find the best products for your needs.

Conclusion

Silicone sealants are a versatile and durable solution for a wide range of applications, from sealing bathtubs to weatherproofing outdoor structures. By understanding silicone sealant lifespan and following proper application and maintenance techniques, you can ensure long-lasting, effective seals.

🚀 Take Action Today: Explore our Silicone Sealant Collection and choose high-quality products designed for durability and performance. Protect your projects and enjoy peace of mind with professional-grade silicone sealants!

Weatherproofing with Silicone Sealants

The Ultimate Guide to Weatherproofing with Silicone Sealants: 10 Expert Tips

Silicone sealants are the unsung heroes of weatherproofing projects, offering unmatched durability, flexibility, and waterproofing for homes, vehicles, and outdoor spaces. Whether you’re sealing windows, protecting outdoor furniture, or tackling heavy-duty industrial applications, silicone sealants are the perfect solution.

In this guide, we’ll explore 10 expert tips for weatherproofing with silicone sealants, troubleshooting common issues, and sharing product recommendations to ensure you achieve long-lasting results.

Why Weatherproofing with Silicone Sealants is Essential

Applying silicone sealant to a window frame using a caulking gun for weatherproofing.

Silicone sealants offer a range of benefits that make them indispensable for weatherproofing applications:

  • Waterproofing: Silicone sealants create a watertight barrier, protecting against leaks and moisture damage.
  • UV Resistance: They resist discoloration and degradation from prolonged sun exposure, making them ideal for outdoor use.
  • Durability: Silicone sealants withstand extreme temperatures, heavy rain, and other harsh weather conditions.
  • Flexibility: They maintain elasticity even after curing, making them ideal for surfaces prone to movement or vibrations.

Quick Fact:

Using silicone sealants on windows and doors can improve insulation by up to 15%, reducing energy costs significantly.

For more on why silicone sealants are a must-have, read our Top 7 Applications of Silicone Sealants.

Top Applications for Weatherproofing with Silicone Sealants

Silicone sealants are versatile and can be used in several critical weatherproofing scenarios:

1. Sealing Windows and Doors

Drafty windows and doors are a major contributor to energy loss. Silicone sealants fill gaps and prevent air leaks, keeping your home energy-efficient and comfortable.

Learn more about window sealing in our Guide to Silicone Sealants for Different Applications.

2. Outdoor Projects: Gutters, Roofs, and Siding

Before and after comparison of a patio surface sealed with silicone-based weatherproofing sealant.

Outdoor areas are exposed to rain, wind, and UV rays, making weatherproofing essential. Use silicone sealants to protect gutters, roofs, and siding from water damage.

  • Pro Tip: For outdoor applications, choose a UV-resistant silicone sealant to prevent cracking or discoloration over time.
  • Example: Use AutoStar Germany Sealant for long-term durability in outdoor projects.

For more outdoor product options, check out ToolStation’s Sealant Buying Guide.

3. Weatherproofing Vehicles

Silicone sealants are indispensable in automotive weatherproofing, sealing windshields, windows, and body panels to prevent water leaks and resist temperature fluctuations.

4. Protecting Outdoor Furniture

Extend the life of your outdoor furniture by sealing joints and edges with silicone sealants. They prevent water damage and reduce wear caused by UV exposure.

  • DIY Idea: Apply a clear silicone sealant to wicker furniture to make it waterproof and weather-resistant.

5. Sealing Decks and Patios

For decks and patios, silicone sealants protect against moisture, cracks, and structural damage caused by water infiltration.

  • Pro Tip: Clean the surface thoroughly before applying the sealant to ensure a strong, lasting bond.

Top Tips for Effective Weatherproofing

1. Choose the Right Silicone Sealant

Not all silicone sealants are created equal. Always choose a high-quality product designed for your specific application, such as AutoStar Germany Multi-Purpose Silicone Sealant for general use.

2. Prepare the Surface

A clean, dry surface is crucial for strong adhesion. Remove dirt, grease, and old sealant before applying new silicone.

3. Apply Evenly

Use a caulking gun for a smooth, even bead of sealant. This prevents air bubbles and ensures a watertight seal.

4. Allow Ample Curing Time

Most silicone sealants cure within 24-48 hours. Avoid exposing the seal to water or extreme conditions during this period.

5. Inspect Regularly

Check seals annually, especially before winter, to identify and repair cracks or peeling sealant.

Troubleshooting Common Weatherproofing Problems

Close-up of peeling sealant around a bathroom sink, showing damage caused by improper application.

Even with proper application, you may encounter issues with silicone sealants. Here’s how to fix them:

  • Solution: Use a mold-resistant sealant like OPTIMUS Waterproof Silicone Sealant and clean the surface regularly.
  • Solution: Ensure proper surface preparation and reapply sealant in a dry, dust-free environment.
  • Solution: Apply steady pressure with a caulking gun and avoid overworking the sealant.

Visit our Complete Guide to Choosing Silicone Sealants for more troubleshooting tips.

FAQs About Weatherproofing with Silicone Sealants

Yes, as long as the wood is clean, dry, and treated for outdoor use.

High-quality sealants can last 5-10 years, depending on exposure and maintenance.

Yes, silicone sealants provide excellent waterproofing, making them ideal for bathrooms, kitchens, and outdoor projects.

Conclusion: Elevate Your Weatherproofing Projects

Weatherproofing with silicone sealants is a simple yet effective way to protect your home, vehicle, and outdoor spaces from moisture, drafts, and extreme weather. By choosing the right products, following expert tips, and maintaining your seals, you can ensure lasting results.

🚀 Get Started Today!
Shop our Silicone Sealant Collection and find the perfect product for your weatherproofing needs.

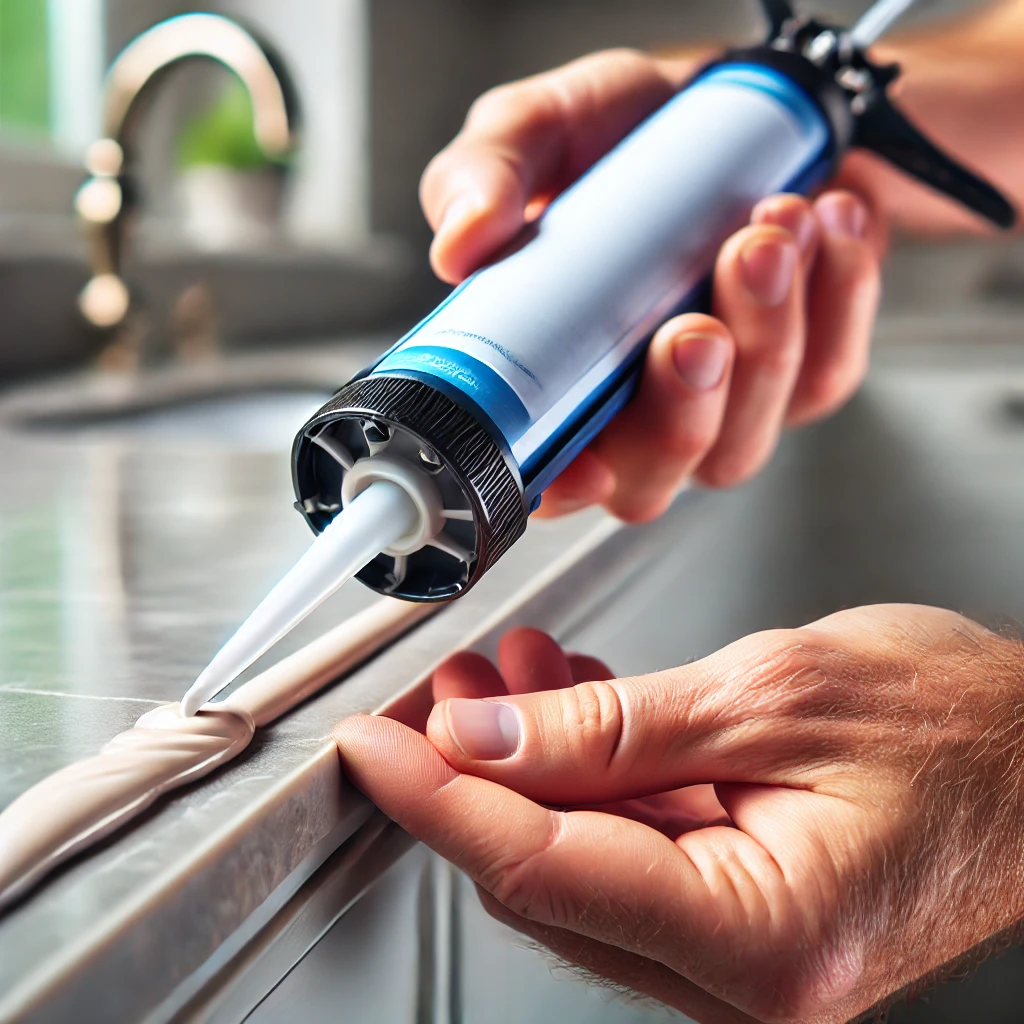
A close-up of hands applying silicone sealant with a caulking gun to a surface, such as a bathroom sink or kitchen countertop

Top 7 Applications of Silicone Sealants: Everyday Uses and Expert Tips

Discover how silicone sealants can elevate your projects with unmatched durability, flexibility, and waterproofing.

Silicone sealants are the unsung heroes of countless projects, from home repairs to industrial applications. With their waterproofing properties, durability, and flexibility, they are essential for sealing gaps, bonding materials, and protecting surfaces. Whether you’re sealing a kitchen sink or weatherproofing your roof, silicone sealants provide reliable, long-lasting results.

This guide explores the top uses of silicone sealants, shares expert tips, and recommends the best products for specific scenarios

Why Silicone Sealants Are Indispensable

Silicone sealants are a favorite among professionals and DIYers due to their unique properties:

Key Benefits of Silicone Sealants:

Close-up of a perfectly sealed joint in a high-moisture environment, such as a bathroom sink, with water droplets highlighting the moisture-resistant silicone seal.
  • Water Resistance: Prevent leaks, mold, and mildew by creating a watertight barrier.
  • Durability: Withstand extreme weather, UV rays, and temperature fluctuations.
  • Flexibility: Remain elastic after curing, accommodating movement in materials without cracking or peeling.

🛠 Pro Tip: Proper application ensures a durable seal. For best practices, read our 5 Pro Tips for Applying Silicone Sealant Like a Pro.

.

1. Bathroom Sealing: Prevent Mold and Mildew

Modern bathroom featuring a white bathtub with clean silicone seals, a tiled backsplash, and a countertop sink with light granite surfaces.

Bathrooms are high-moisture environments, making them prone to mold and water damage. Silicone sealants are a must-have for sealing gaps around sinks, bathtubs, shower enclosures, and toilets.

Why It’s Critical

Without a proper seal, water can seep into cracks, causing structural damage, mold growth, and unsightly stains.

Expert Tips for Bathroom Sealing

  • Choose Mold-Resistant Products: Use a product like OPTIMUS Waterproof Silicone Sealant for long-lasting mildew protection.
  • Surface Prep: Remove old sealant, clean thoroughly, and dry before application.
  • Regular Cleaning: Maintain the sealant with antibacterial cleaners to prevent discoloration and buildup.

🔗 Related Blog: How to Maintain and Extend the Life of Silicone Sealants.

2. Kitchen Sealing: Protect Against Water and Grease

Modern kitchen sink with a shiny chrome faucet, gray mosaic backsplash, and vibrant decor including lemons and plants

In the kitchen, silicone sealants protect against water, grease, and food debris that could lead to stains or bacterial growth. Seal gaps around countertops, sinks, and backsplashes to keep your kitchen clean and functional.

Recommended Product

AutoStar Germany Multi-Purpose Silicone Sealant: Excellent adhesion and grease resistance make it ideal for kitchens.

Tips for Kitchen Sealing

  • Clean Weekly: Wipe sealed areas regularly to prevent grease buildup.
  • Inspect for Wear: Check for cracks or peeling and reapply sealant as needed.

🔗 Explore More: Learn about versatile sealant options in our Complete Guide to Choosing Silicone Sealants.

A person applying sealant to a window frame using a caulking gun, with a view of green trees through the glass.

3. Window and Door Sealing: Improve Energy Efficiency

Drafty windows and doors not only let in cold air but also drive up energy costs. Silicone sealants are perfect for filling gaps, improving insulation, and keeping your home comfortable year-round.

Pro Tips for Window and Door Sealing

  • Use a Caulking Gun: Apply a smooth, even bead for a professional finish.
  • Inspect Regularly: Check seals before winter and summer to ensure optimal performance.

🔗 Further Reading: Discover weatherproofing uses in our Guide to Silicone Sealants for Different Applications.

4. Automotive Repairs: Durable Sealing for Vehicles

A close-up of a professional applying sealant to a car windshield or body panel using a caulking gun in a well-lit auto repair shop.

Silicone sealants are invaluable in automotive maintenance. Use them to seal windshields, windows, and body panels. Their elasticity and durability make them ideal for withstanding vibrations, moisture, and temperature changes.

Product Highlight

AutoStar Germany Windscreen Glass Sealant: Provides excellent adhesion and weather resistance for vehicle repairs.

Application Tips

  • Clean Surfaces Thoroughly: Remove dirt, grease, and debris before applying sealant.
  • Masking Tape for Precision: Outline the area with tape for a neat finish.

5. Outdoor Projects: Weatherproofing Solutions

A close-up view of a professional sealing a rooftop gutter to prevent leaks using a caulking gun and sealant, with a clean, modern roof and sunny outdoor setting.

Outdoor sealing projects demand products that can handle rain, UV rays, and temperature swings. Silicone sealants are perfect for sealing roofs, gutters, siding, and patios.

Best Practices for Outdoor Use

🔗 External Resource: ToolStation’s Sealant Buying Guide.

6. DIY Crafts and Repairs: Unleash Creativity

A close-up of hands repairing a cracked ceramic pot or crafting a waterproof decorative item using silicone sealant in a creative workspace.

Silicone sealants are versatile enough for creative DIY projects. They’re perfect for crafting waterproof decorations, repairing ceramics, or even creating molds.

Tips for DIY Projects

  • Go Transparent: Clear silicone sealants provide a clean, polished look.
  • Test First: Check compatibility on a small area before applying to your project.

7. Industrial Applications: Built for High-Stress Environments

A close-up of industrial machinery with visible silicone seals applied to joints and components, highlighting durability and leak prevention in a clean industrial setting.

In industrial settings, silicone sealants excel at sealing heavy-duty joints, machinery, and high-temperature equipment. Their durability under extreme conditions makes them a trusted choice.

Best Product for Industrial Applications

High-modulus silicone sealants are designed to withstand heavy stress and high temperatures, ensuring long-term reliability.

Common Silicone Sealant Issues and Solutions

Even with high-quality sealants, challenges can arise. Here’s how to troubleshoot:

IssueSolution

Mold Growth

Use mold-resistant products like OPTIMUS Waterproof Silicone Sealant and clean regularly.

Peeling or Cracking

Ensure surfaces are clean, dry, and properly prepared before applying sealant.

Air Bubbles

Use steady pressure with a caulking gun to avoid bubbles.

🔗 Find More Solutions: Visit our Complete Guide to Choosing Silicone Sealants.

A close-up of cracked and deteriorating sealant on a surface, showing visible damage and aging, with a neutral background for emphasis.

FAQs About Silicone Sealants

Most silicone sealants aren’t paintable. If painting is necessary, use a paintable sealant or mask off the area.

With proper maintenance, silicone sealants can last 5-10 years.

Yes, they are highly water-resistant, making them ideal for kitchens, bathrooms, and outdoor projects.

Conclusion: Unlock the Potential of Silicone Sealants

From sealing bathrooms and kitchens to weatherproofing outdoor projects, silicone sealants are versatile, durable, and reliable. By choosing the right product and following best practices, you can ensure long-lasting, professional results.

🚀 Ready to start? Explore our Silicone Sealant Collection to find the perfect sealant for your next project!

Professional workspace with tools for silicone sealant maintenance, including a caulking gun, gloves, and cleaning supplies.

How to Maintain and Extend the Life of Silicone Sealants: Pro Tips and Tricks

Learn essential maintenance tips for silicone sealants to extend their life and durability. From cleaning to repair, this guide covers everything you need to know.


Silicone sealants are an indispensable solution for waterproofing, sealing gaps, and protecting surfaces in kitchens, bathrooms, and even outdoor areas. However, to get the best performance from your silicone sealants, it’s crucial to follow proper maintenance practices. In this comprehensive guide, we’ll explore expert tips and best practices for maintaining silicone sealants to extend their life and ensure they remain effective.

Why Silicone Sealant Maintenance is Important

Silicone sealants can degrade over time due to exposure to moisture, UV light, and general wear and tear. Regular maintenance can prevent issues such as mold growth, peeling, and cracks, which can ultimately save you money on repairs and replacements. By taking proactive steps, you ensure that your sealants continue to perform their vital functions effectively.

Common Issues That Affect Silicone Sealants

  • Mold and Mildew Growth: Moist environments like bathrooms and kitchens are especially prone to mold.
  • UV Damage: Outdoor silicone sealants can crack or discolor with prolonged sun exposure.
  • Peeling and Cracking: Poor application or low-quality products can lead to premature peeling and cracking.

For proper application techniques to avoid these issues, check out our Top 5 Essential Tips for Applying Silicone Sealant Like a Pro.

Essential Tips to Maintain Silicone Sealant

1. Clean Regularly to Prevent Mildew and Stains

Consistently cleaning your silicone sealants is crucial for preventing mold and mildew. Use a mild cleaner and a soft cloth to gently remove any buildup. For kitchen and bathroom areas, consider using an antibacterial cleaner to keep the surface hygienic.

  • Pro Tip: Avoid abrasive cleaners or tools that can damage the sealant.

2. Check for Cracks and Wear

Periodically inspect your silicone sealants for any signs of wear and tear. If you spot cracks or peeling, it’s essential to repair the seal immediately to prevent water damage.

  • Quick Tip: Set a reminder every few months to perform a quick inspection.

For repair tips, refer to our Guide to Silicone Sealants for Different Applications, where we discuss the best sealants for various purposes.

3. Use Quality Products for Repairs

When performing maintenance or repairs, always choose high-quality silicone sealants. Low-quality products may not adhere well and can wear out faster.

  • Recommended: Opt for sealants that are specifically designed for your application needs.

For more on selecting the right sealant, see our Complete Guide to Choosing Silicone Sealants.

Recommended Products for Sealant Maintenance

Using the right products can help in maintaining and extending the life of your silicone sealants. Here are some top recommendations:

When to Replace Silicone Sealant

Silicone sealants typically last several years, but if you notice persistent mildew, discoloration, or peeling that doesn’t respond to cleaning or repair, it may be time to replace the sealant entirely. In high-traffic areas, plan to replace sealants every 3-5 years, or as needed based on their condition.

  • Warning Signs:
    • Frequent mold growth despite cleaning.
    • Noticeable gaps or separation from surfaces.
    • Discoloration that affects the appearance of your space.

FAQ: Silicone Sealant Maintenance

How often should I clean my silicone sealant?

To prevent buildup, clean your silicone sealant at least once a month, especially in areas exposed to high moisture.

Can I paint over silicone sealant?

Most silicone sealants aren’t paintable. For painted surfaces, consider using a specialized paintable sealant or consult our Complete Guide to Choosing Silicone Sealants.

How long does silicone sealant last?

With proper maintenance, silicone sealants can last 5-10 years. High-quality products, like those available in our store, tend to offer better durability.

Conclusion

Diligent maintenance can significantly extend the life and effectiveness of your silicone sealants. By following these pro tips and using quality products, you can ensure your seals stay strong and reliable for years to come.

Ready to upgrade your sealant maintenance routine? Explore our Silicone Sealant Collection for products that deliver exceptional performance and longevity.


For additional expert advice and product options, don’t hesitate to contact us. We’re here to help you achieve the best results for your projects.


External Resource: For more information on sealant types and uses, check out Toolstation’s Sealant Buying Guide.

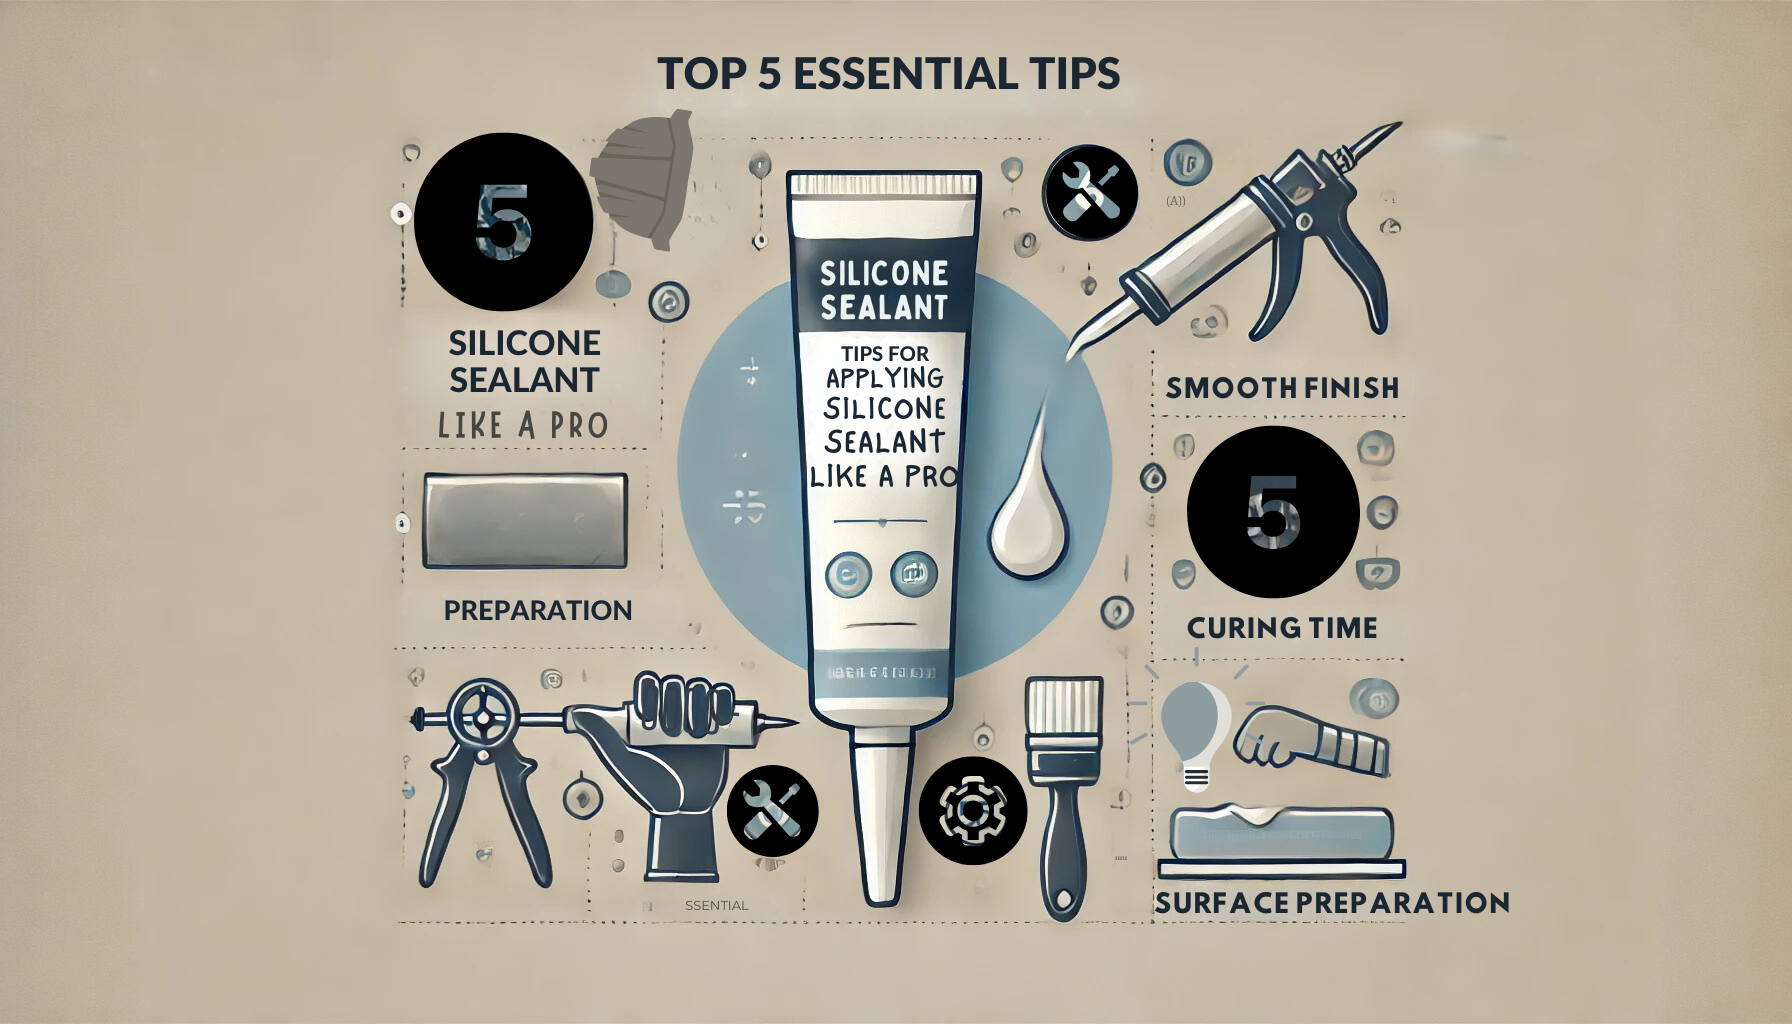
Illustration of a silicone sealant tube surrounded by icons representing essential tips for applying silicone sealant like a professional. The image includes symbols for caulking, smooth finish, curing timer, and surface preparation.

5 Pro Tips for Perfectly Applying Silicone Sealant Like a Pro

Learn the Top Techniques for Achieving a Professional-Quality Silicone Seal Every Time

Applying silicone sealant is essential for achieving a long-lasting, professional finish so achieving a perfect seal isn’t just about the product—it’s about technique. With the right application, your silicone sealant can provide a durable, professional finish that stands the test of time. Whether you’re a DIY enthusiast or a seasoned professional, these essential tips will help you achieve a long-lasting, smooth finish on your next project..

1. Choose the Right Silicone Sealant for Long-Lasting Results

Using the correct type of silicone prevents peeling, poor adhesion, and mildew growth, ensuring your seal lasts. When applying silicone sealant, it’s crucial to prepare the surface correctly to ensure durability and adhesion.

Recommended Products

OPTIMUS Waterproof Silicone Sealant

  • Quick-curing, mold-resistant formula
  • Ideal for bathrooms, kitchens, and high-moisture areas

AutoStar Germany Windscreen Glass Sealant

  • Temperature and vibration-resistant
  • Perfect for automotive glass bonding

For more insights on different sealant types and their uses, check out the Toolstation Sealant Buying Guide.

2. How to Prepare the Surface for Silicone Sealant Application

Proper surface preparation ensures better adhesion and prevents the sealant from lifting or peeling.

Even the highest-quality silicone sealants, like AutoStar Germany Multi-Purpose Silicone, won’t adhere well if the surface is dusty, greasy, or has old sealant residue.

Pro Tip:

  • Lightly scuff non-porous surfaces (like glass or metal) with sandpaper to improve adhesion.
  • Clean with rubbing alcohol or a mild solvent to remove dust and grease.

3. Apply Even Pressure with a Caulking Gun for Smooth Sealing

A smooth, even application prevents gaps that weaken the seal and allows the silicone to adhere consistently.

Cut the nozzle of the silicone tube at a 45-degree angle to control the bead size, and apply steady pressure to avoid air bubbles. This technique works well with fast-curing sealants like OPTIMUS Waterproof Silicone Sealant.

Quick Tip:

  • For high-moisture areas like bathrooms, opt for acetoxy silicones as they cure quickly and resist mold.

4. Tool the Joint for a Smooth Finish

Tooling the silicone bead improves its appearance and ensures it adheres securely on both sides of the joint.

After applying the silicone, use a caulking tool or even a plastic spoon to smooth out the bead. This step is essential in areas exposed to water to create a watertight seal.

Pro Tip:

  • Dip your caulking tool in soapy water to prevent the silicone from sticking, making it easier to achieve a smooth finish.

5. Allow Ample Time for Curing

Proper curing is essential for creating a strong, durable bond that withstands environmental stress over time.

Each silicone type has a different curing time. For example, acetoxy silicones cure faster, which is great for quick repairs, while neutral cure silicones may need longer curing times for optimal bonding.

Best Practice:

Common Mistakes to Avoid When Applying Silicone Sealant

Even with the right tools and techniques, small mistakes can impact the effectiveness of a silicone seal. Here are some common pitfalls to avoid for a flawless, professional result.

1. Skipping Surface Preparation

One of the most frequent mistakes is neglecting proper surface preparation. Applying silicone to a dirty or greasy surface will prevent it from adhering properly, which can lead to peeling and gaps in the seal. Always make sure surfaces are clean, dry, and free from oils or old sealant residue before application.

2. Applying Silicone Too Thickly or Too Thinly

Applying too much silicone can lead to an unsightly, bulky bead that takes longer to cure, while applying too little may result in an insufficient seal. The ideal bead size depends on the joint width and type of application. For most DIY projects, a 3-5mm bead is a good balance between coverage and aesthetics.

3. Not Tooling the Sealant Quickly Enough

Silicone begins to skin over and cure within minutes of application. If you wait too long to tool the sealant, you may not achieve a smooth, even finish. For best results, tool the silicone within a few minutes after applying it.

4. Skipping Masking Tape on Edges

Masking tape can make a huge difference when it comes to achieving clean edges. Before applying the silicone, use masking tape along both sides of the joint to ensure a precise finish. Remove the tape immediately after tooling to avoid pulling up the sealant.

5. Ignoring Temperature and Humidity Conditions

Environmental factors can affect the curing process. Applying silicone in cold or damp conditions may slow down curing, while hot, dry conditions can cause the silicone to cure too quickly. For best results, apply silicone at moderate room temperature (between 5°C and 35°C) with low humidity.

6. Choosing the Wrong Type of Silicone Sealant

Using the wrong type of silicone for a specific application can cause premature seal failure. For instance, a general-purpose sealant may not withstand high moisture or temperature fluctuations. When sealing wet areas, always choose a mold-resistant, waterproof sealant like OPTIMUS Waterproof Silicone Sealant, while for high-temperature applications, consider a high-temperature-resistant silicone.

Troubleshooting Common Silicone Sealant Issues

Having trouble with your silicone application? Here are solutions to common issues:

  • 🚫 Problem: Silicone isn’t adhering properly

    • 🛠 Solution: Ensure the surface is completely clean and dry. For tough surfaces, consider a primer or light sanding.
  • 🚫 Problem: Air bubbles in the silicone

    • 🛠 Solution: Apply steady, even pressure with the caulking gun and tool the joint immediately to remove trapped air.
  • 🚫 Problem: Silicone discolors over time

    • 🛠 Solution: Use UV-resistant silicone in areas exposed to sunlight, and always apply mold-resistant silicone in high-moisture areas.
  • 🚫 Problem: Sealant isn’t spreading smoothly

    • 🛠 Solution: Apply silicone in a warm environment, as cold temperatures can make it harder to spread smoothly.
  • 🚫 Problem: Silicone is peeling off after curing

Need help finding the right sealant? Check out our Silicone Sealant Collection for durable, high-performance options.

Frequently Asked Questions (FAQ)

Q1: How do I remove old silicone before applying new sealant?
Use a silicone remover or utility knife to carefully scrape away the old sealant. Clean the area thoroughly with rubbing alcohol or a mild solvent before reapplying.

Q2: Can I paint over silicone sealant?
Most silicones aren’t paintable due to their flexible, non-porous nature. If you need a painted finish, consider an acrylic or hybrid sealant, or use painter’s tape to create clean edges around painted areas.

Q3: How long does silicone last once applied?
High-quality silicone sealants, like those offered by AutoStar and OPTIMUS, can last several years when applied correctly and maintained.

Q4: Can silicone sealants be used outdoors?
Yes, many silicone sealants are UV-resistant, making them suitable for outdoor applications. Be sure to choose a product that’s labeled as outdoor-safe.

Q5: How can I remove silicone residue after taking off old sealant?
Use rubbing alcohol or a silicone remover to dissolve any residue. This step ensures the new sealant bonds properly.

Get Ready for a Pro-Level Seal!

Using the right silicone sealant and applying it properly can make all the difference in the quality and durability of your project. Whether you’re working on bathroom tiles, a kitchen sink, or a car windshield, following these tips will ensure professional results.

Ready to achieve professional-quality results? Browse our Silicone Sealant Collection to find high-performance products tailored for your needs, and start achieving a durable, waterproof seal today!

Search for products

Back to Top
Product has been added to your cart