An industrial warehouse with pipes and machinery representing areas for sealant applications.

10 Essential Uses of Silicone Sealants in Everyday Life

Silicone sealants are among the most versatile tools available for both professional and DIY projects. Whether you’re repairing a leaky window, assembling furniture, or protecting delicate electronics, silicone sealants are the unsung heroes of home and industrial applications. Their flexibility, water resistance, and durability make them indispensable for a variety of tasks.

In this article, we’ll explore 10 essential uses of silicone sealants, providing you with practical insights and tips to make the most of this amazing product.

What Are Silicone Sealants?

Silicone sealants are flexible, rubber-like substances used to seal gaps, bond surfaces, and protect materials from water, air, and other external factors. Made from silicone polymers, these sealants are highly resistant to extreme temperatures, UV rays, and moisture, making them ideal for long-lasting applications indoors and outdoors.

Sealing Leaky Windows and Doors

A set of home repair tools neatly arranged on a wooden workbench.

One of the most common uses of silicone sealants is fixing leaky windows and doors. Drafty windows can increase energy bills, while leaks can lead to water damage over time. Silicone sealants provide a weatherproof, airtight seal to keep moisture and drafts at bay.

Simply clean the area, apply the sealant along the edges, and smooth it out for a professional finish. This quick fix can save money on energy costs and protect your home from unwanted water damage.

Waterproofing Bathrooms and Kitchens

A modern kitchen with a white countertop and stainless steel sink.

Bathrooms and kitchens are prone to water exposure, which can cause mold and mildew growth. Silicone sealants are perfect for sealing gaps around sinks, bathtubs, shower enclosures, and tiles.

Their waterproof properties ensure that water doesn’t seep into unwanted areas. For example, you can use clear silicone sealants around your kitchen countertop edges or bathroom tiles for a clean and long-lasting seal.

Automotive Repairs

A car with its hood open, ready for minor repairs in a workshop.

Did you know that silicone sealants play a crucial role in vehicle maintenance? From sealing windshields to minor engine repairs, silicone sealants can withstand the high temperatures and vibrations found in cars.

For instance, they can be used to seal leaks in a car’s cooling system or to create strong bonds in parts that require flexibility. Their versatility makes them a go-to for mechanics and car enthusiasts alike.

Electronics Protection

A green circuit board with microchips and connectors.

Silicone sealants are widely used in the electronics industry to protect sensitive components. They shield circuit boards, connectors, and other electronic parts from moisture, dust, and environmental damage.

By applying a thin layer of silicone sealant, you can extend the lifespan of your gadgets and ensure they remain functional even in humid conditions.

DIY Craft Projects

A crafting table with tools and decorative items, showcasing a DIY project in progress.

If you’re into DIY crafts, silicone sealants can unlock endless creative possibilities. They can be used to make molds for candles or jewelry, glue materials together, or create decorative designs on various surfaces.

Their flexibility and quick curing time make them ideal for projects that require precision and durability. You can even experiment with colored silicone sealants to add a unique touch to your crafts.

Industrial Applications

An industrial warehouse with pipes and machinery representing areas for sealant applications.

Silicone sealants are indispensable in industries like construction, aerospace, and marine due to their heat resistance and durability. They are used to seal joints, bond materials, and protect structures from environmental damage.

For example, in construction, silicone sealants are applied to glass panels in skyscrapers to create weatherproof seals that withstand high winds and temperature changes.

Roof and Gutter Repairs

A clean rooftop gutter with a bright sky in the background.

Cracks and leaks in roofs or gutters can lead to costly water damage. Silicone sealants provide a reliable solution for sealing gaps and preventing water penetration.

Simply apply the sealant to the damaged area, and it will create a waterproof barrier that can withstand harsh weather conditions.

Aquariums and Fish Tanks

A glass aquarium with colorful fish and underwater plants.

Silicone sealants are non-toxic and waterproof, making them ideal for aquariums and fish tanks. They can be used to bond glass panels or repair leaks without harming aquatic life.

Their durability ensures that the aquarium remains leak-free for years, giving you peace of mind while caring for your fish and plants.

Furniture Assembly and Repairs

A partially assembled wooden table with tools and brackets.

Silicone sealants are great for repairing and assembling furniture. They can bond materials like wood, glass, or metal, providing a secure and flexible hold.

For example, if your glass tabletop has come loose from its frame, silicone sealants can reattach it seamlessly and invisibly.

HVAC Systems

HVAC systems require proper sealing to ensure energy efficiency and prevent air leaks. Silicone sealants are used to seal ducts, insulate joints, and improve the overall performance of HVAC systems.

By reducing air leaks, silicone sealants help lower energy costs and maintain consistent indoor temperatures.

How to Choose the Right Silicone Sealant

Choosing the right silicone sealant depends on the type of project. Here are some factors to consider:

  • Type of Surface: Ensure the sealant is compatible with the materials you’re working with, such as glass, metal, or plastic.
  • Curing Time: Some projects may require faster curing sealants.
  • Application Environment: Opt for heat-resistant or waterproof sealants depending on where the product will be used.

Tips for Using Silicone Sealants Effectively

  • Prepare the Surface: Ensure the surface is clean, dry, and free of dust or grease.
  • Use a Caulking Gun: For an even application, use a caulking gun to apply the sealant.
  • Smooth the Sealant: Use a wet finger or a caulking tool to smooth the sealant for a clean finish.
  • Follow Instructions: Always check the product label for curing times and application tips.

Conclusion

Silicone sealants are incredibly versatile and offer solutions for everything from home repairs to industrial applications. Their flexibility, durability, and waterproof properties make them a must-have for professionals and DIY enthusiasts alike.

Whether you’re sealing a leaky window, repairing a roof, or protecting your electronics, silicone sealants can simplify your life and save you time and money.

FAQs

What makes silicone sealants different from other sealants?
Silicone sealants are highly flexible, waterproof, and resistant to extreme temperatures, making them more durable than other types of sealants.

Can I use silicone sealants for outdoor applications?
Yes, silicone sealants are UV-resistant and weatherproof, making them perfect for outdoor projects.

Are silicone sealants safe for aquariums?
Yes, non-toxic silicone sealants are safe for aquariums and aquatic life.

How long does silicone sealant take to cure?
Curing time varies but generally takes 24–48 hours for a full cure.

Can silicone sealants be painted over?
Most silicone sealants are not paintable. However, some hybrid sealants allow for painting.

Are silicone sealants eco-friendly?
While silicone sealants are durable, eco-friendly options are available with low VOC levels.

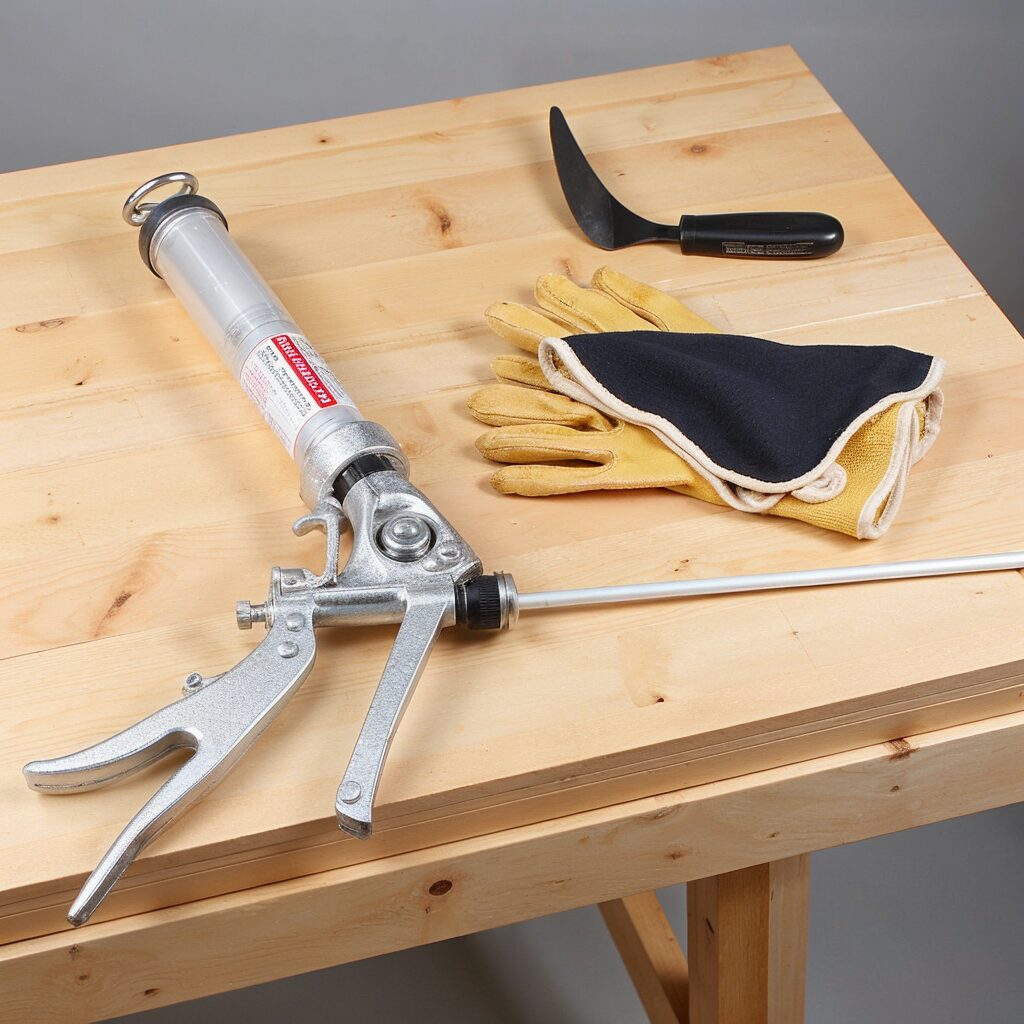
A workbench with a caulking gun, scraper, and gloves for leak repairs.

How to Repair Leaks with Silicone Sealants: A Step-by-Step Guide

Leaks can be a nightmare, whether they’re in your bathroom, kitchen, roof, or vehicle. Left untreated, they can lead to water damage, mold growth, and costly repairs. Fortunately, silicone sealants offer a quick, effective, and long-lasting solution.

In this blog, we’ll guide you through the process of repairing leaks with silicone sealants, from preparation to application. Plus, we’ll recommend the best products for the job and answer frequently asked questions. Let’s get started!

💡 Related Blog: Learn more about the versatility of silicone sealants in The Essential Guide to Silicone Sealants in Everyday Projects.

Why Silicone Sealants Are the Best for Leak Repairs

Silicone sealants are a popular choice for leak repairs because of their unique properties:

  • Waterproof: Perfect for high-moisture areas like bathrooms, kitchens, and roofs.
  • Durable: Resistant to wear and tear, ensuring long-lasting protection.
  • Flexible: Moves with the surface to prevent cracks from reappearing.

💡 Related Blog: Explore their other benefits in Top Benefits of Silicone Sealants.

Common Areas Prone to Leaks

1. Bathrooms

Water dripping from a faucet onto a sink, showing moisture buildup.
  • Around bathtubs, sinks, and shower enclosures.
  • Common issue: Gaps in grout or old sealant can let water seep through.

2. Kitchens

  • Countertops, backsplashes, and pipes under sinks.
  • Common issue: Leaks from plumbing fixtures or water spills.

3. Roofs

  • Cracks or gaps in roofing materials, especially around flashing.
  • Common issue: Water infiltration during heavy rains.

4. Vehicles

  • Windscreen edges, car windows, and sunroofs.
  • Common issue: Water entering the interior during rain or car washes.

💡 Related Blog: For vehicle-specific repairs, read Guide to Windscreen Bonding Glue.

Step-by-Step Guide to Repairing Leaks with Silicone Sealants

1. Gather Your Tools

A workbench with a caulking gun, scraper, and gloves for leak repairs.

You’ll need:

  • Silicone sealant (e.g., OPTIMUS Waterproof Silicone Sealant)
  • A caulking gun
  • Scraper or silicone remover
  • Cleaning supplies (rubbing alcohol, dry cloths)
  • A smoothing tool or damp finger

💡 Related Blog: Learn how to safely remove old sealant in How to Remove Silicone Sealant Safely.

2. Prepare the Surface

  • Remove any old sealant using a scraper or silicone remover.
  • Clean the area thoroughly with rubbing alcohol to remove dirt, grease, or soap residue.
  • Allow the surface to dry completely before applying the new sealant.

3. Apply the Silicone Sealant

A smooth line of sealant applied to a bathroom tile edge.
  • Insert the sealant tube into the caulking gun.
  • Cut the nozzle at a 45° angle to create a bead size that matches your project.
  • Apply a smooth bead of silicone sealant along the edge of the leak.

💡 Pro Tip: Work in small sections to maintain control and avoid gaps.

4. Smooth the Bead

A hand smoothing sealant on a surface using a plastic tool.
  • Use a smoothing tool or damp finger to press the sealant into the joint and create a clean, professional finish.
  • Wipe away any excess sealant immediately.

5. Allow Time to Cure

  • Check the manufacturer’s instructions for curing time, typically 24–48 hours.
  • Avoid exposing the area to water or stress during this period.

💡 Related Blog: For flawless results, follow Pro Tips for Applying Silicone Sealant.

Top Products for Leak Repairs

1. OPTIMUS Waterproof Silicone Sealant

  • Best for: Bathrooms, kitchens, and high-moisture areas.
  • Benefits: Waterproof and mold-resistant for long-lasting performance.

2. AutoStar Germany Windscreen Glass Sealant (310ml)

  • Best for: Automotive windscreen bonding and sealing car windows.
  • Benefits: High-strength formula designed for extreme weather conditions.

3. AutoStar Germany Multi-Purpose Silicone Sealant

  • Best for: All-purpose repairs in homes and vehicles.
  • Benefits: Durable and versatile for a wide range of projects.

FAQs About Leak Repairs with Silicone Sealants

How do I choose the right silicone sealant for leaks?

How long does silicone sealant last on leak repairs?

  • High-quality sealants can last 10–20 years with proper application.

Can I use silicone sealant on outdoor leaks?

How long does silicone sealant take to cure?

  • Most products cure within 24–48 hours, but check the manufacturer’s instructions for specifics.

Conclusion

Silicone sealants are your go-to solution for repairing leaks in bathrooms, kitchens, roofs, and vehicles. By following the right steps and using high-quality products like OPTIMUS Waterproof Silicone Sealant, you can ensure long-lasting, professional-grade results.

💡 Call-to-Action: Ready to fix those leaks? Explore our range of premium silicone sealants here.

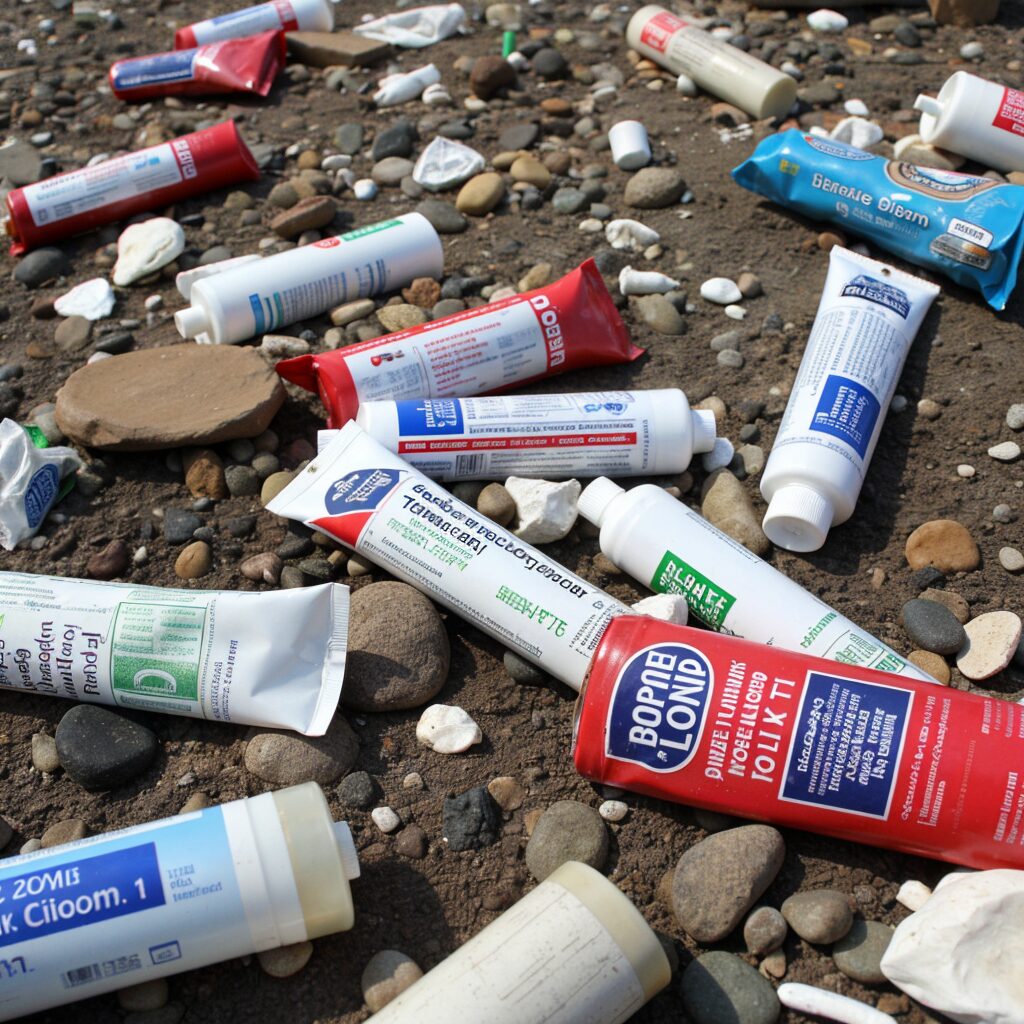
Silicone sealant tubes discarded in a landfill with non-biodegradable waste.

The Environmental Impact of Silicone Sealants: Eco-Friendly Practices and Alternatives

Silicone sealants are widely valued for their flexibility, durability, and resistance to water and extreme temperatures, making them a go-to product for construction, automotive, and DIY projects. However, as with any manufactured product, their environmental impact—spanning production, use, and disposal—requires careful attention.

This blog explores the ecological footprint of silicone sealants and provides actionable steps for more sustainable use. We’ll also showcase some of the best eco-conscious products available in our shop.

💡 Related Blog: Learn how silicone sealants perform in versatile applications in The Essential Guide to Silicone Sealants in Everyday Projects.

Understanding the Environmental Impact

Silicone sealant production with factory emissions and silica refining machinery.

1. Production and Raw Materials

Silicone sealants are made using silica, a material derived from sand. Although silica itself is abundant, the process of refining it into silicone involves high energy consumption and chemical processing, contributing to carbon emissions and resource depletion.

  • Tip for Sustainability: Look for products manufactured by companies committed to sustainable practices and renewable energy use.

💡 Related Blog: Curious about the science behind silicone sealants? Read The Science Behind Silicone Sealants: How They Work.

2. Usage and Application

Hand applying silicone sealant with a caulking gun on bathroom tiles.

While silicone sealants are highly effective, improper application can result in unnecessary waste. Over-application, for example, often leads to wastage that ends up in landfills, where it persists indefinitely.

  • Tip for Sustainability: Use tools like caulking guns for precise application and ensure the sealant is applied only where it is needed.

💡 Related Blog: Avoid common mistakes by reading Applying Silicone Sealant Mistakes You Shouldn’t Make.

3. Disposal Challenges

Silicone sealant tubes discarded in a landfill with non-biodegradable waste.

Once cured, silicone sealants are non-biodegradable, meaning they don’t break down naturally. Improper disposal, such as throwing unused product in household waste, can contribute to landfill overflow.

  • Tip for Sustainability: Always dispose of sealant tubes according to local recycling or hazardous waste disposal guidelines.

💡 Related Blog: If you’re removing old sealant, follow the steps outlined in How to Remove Silicone Sealant Safely.

Eco-Friendly Products Available

Switching to high-quality, durable products reduces waste and ensures long-lasting results. Here are eco-conscious products you can choose from our shop:

1. AutoStar Germany Multi-Purpose Silicone Sealant

This versatile sealant is perfect for various home and industrial applications. Its durability ensures fewer reapplications, reducing material waste over time.

  • Applications: Bathrooms, kitchens, windows, and doors.
  • Eco-Benefit: Multi-purpose use minimizes the need for multiple products, reducing overall waste.

2. AutoStar Germany Windscreen Glass Sealant (310ml)

Specifically designed for automotive applications, this high-strength sealant ensures long-lasting windshield bonding while resisting extreme weather conditions.

  • Applications: Automotive windscreen bonding, sealing car windows, and other vehicle repairs.
  • Eco-Benefit: High durability reduces the frequency of repairs and sealant use.

💡 Related Blog: Read Adhesives in Automotive Repairs to discover why this sealant is a trusted choice for car maintenance.


3. OPTIMUS Waterproof Silicone Sealant

Engineered for waterproofing applications, this product is mold-resistant and perfect for areas exposed to moisture, such as bathrooms and kitchens.

  • Applications: Sealing bathtubs, sinks, shower enclosures, and countertops.
  • Eco-Benefit: Long-lasting waterproof performance eliminates the need for frequent reapplications.

💡 Related Blog: Need waterproofing tips? Check out Weatherproofing with Silicone Sealants: Tips for Success.

Sustainable Usage Tips

1. Buy Only What You Need

Calculate how much sealant you’ll need before starting your project to avoid over-purchasing.

💡 Related Blog: Unsure which product to buy? Read How to Choose the Best Silicone Sealant for Any Project.

2. Store Unused Sealant Properly

Partially used sealant tubes often go to waste due to improper storage. Seal the nozzle tightly and store in a cool, dry place to extend their usability.

💡 Related Blog: Learn storage techniques in How to Maintain and Extend the Life of Silicone Sealant.

3. Use Precision Tools for Application

Invest in a high-quality caulking gun to ensure clean and efficient application, which reduces waste.

💡 Related Blog: Follow step-by-step application techniques in Pro Tips for Applying Silicone Sealant.

FAQs

Q1: Are silicone sealants biodegradable?
No, silicone sealants are not biodegradable. However, products like OPTIMUS Waterproof Silicone Sealant are long-lasting, reducing the need for frequent replacements.

Q2: How should I dispose of unused silicone sealants?
Follow local hazardous waste disposal guidelines to ensure proper handling.

Q3: Which sealant is ideal for versatile home projects?
The AutoStar Germany Multi-Purpose Silicone Sealant is a reliable choice for a range of uses.

Q4: What’s the best option for automotive projects?
For car windshields and windows, the AutoStar Germany Windscreen Glass Sealant (310ml) provides durable and weather-resistant bonding.

Conclusion

Silicone sealants are essential for construction, automotive, and DIY projects, but their environmental impact needs attention. By selecting eco-friendly products like OPTIMUS Waterproof Silicone Sealant, adopting sustainable practices, and properly disposing of waste, we can significantly reduce their footprint.

💡 Call-to-Action: Ready to start your next project? Visit our shop to explore our premium silicone sealants and make a sustainable choice today!

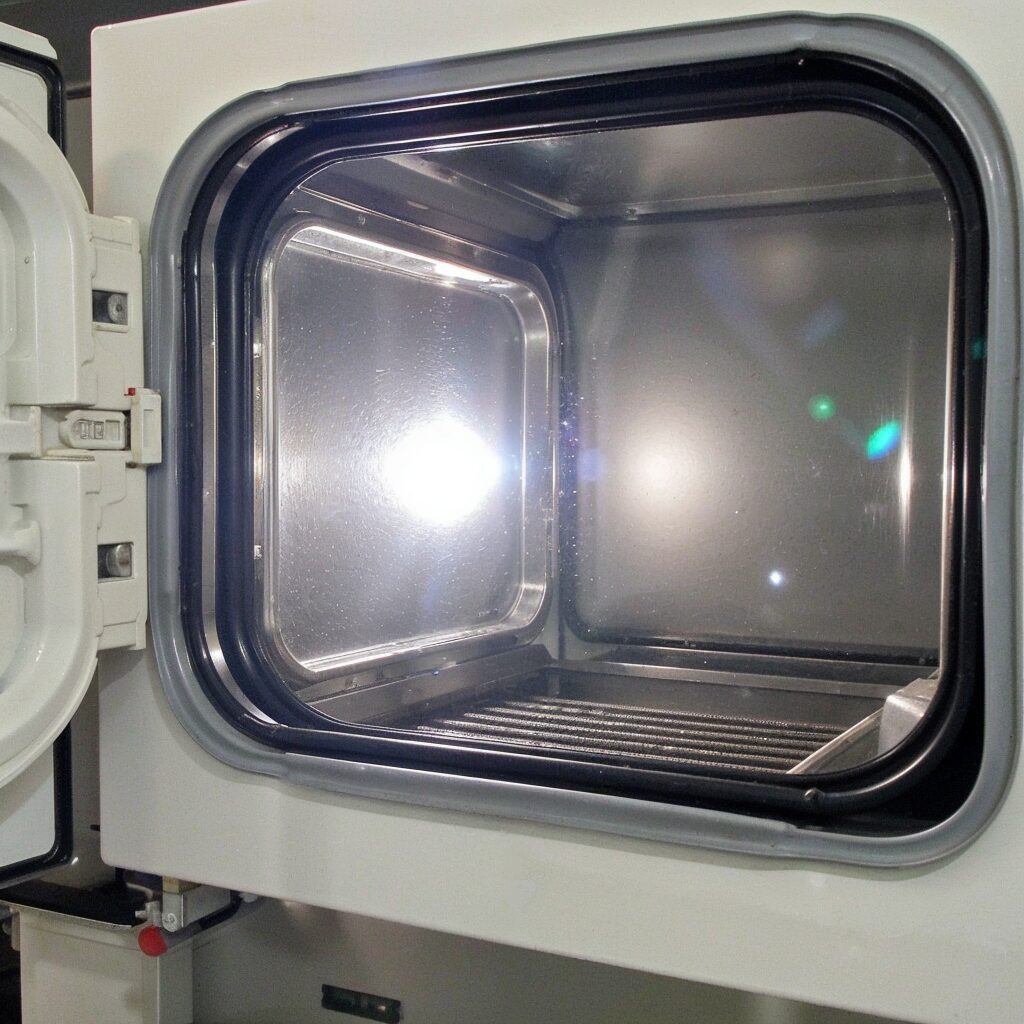
High-temperature industrial oven sealed with silicone sealant for durability.

Innovative Applications of Silicone Sealants: Beyond the Basics

Silicone sealants have long been a go-to solution for sealing, bonding, and protecting surfaces. Known for their unmatched durability, flexibility, and resistance to extreme conditions, they are most commonly used in bathrooms, kitchens, and outdoor weatherproofing projects. But their potential goes far beyond the basics.

In this blog, we’ll dive into the innovative and lesser-known applications of silicone sealants across various industries. Whether you’re a DIY enthusiast, automotive professional, or working in healthcare or electronics, you’ll discover new ways to put this versatile product to work.

Why Silicone Sealants Are More Than Just a Basic Tool

Silicone sealants are celebrated for their durability, waterproofing, and heat resistance, but what truly sets them apart is their versatility. They can adhere to a wide variety of materials like glass, metal, plastic, and even ceramics. Their ability to maintain flexibility while offering a strong bond makes them ideal for unique and specialized applications across industries.

💡 Looking for a guide to keep your silicone sealants performing at their best? Check out our blog on How to Maintain and Extend the Life of Silicone Sealants.

Silicone Sealants in Electronics

Applying silicone sealant to an electronic circuit board for moisture protection.

Protecting Circuit Boards

Electronics require precise protection against environmental hazards like dust and moisture. Silicone sealants act as a shield, preventing corrosion and electrical failures.

  • How It’s Done: Apply a thin coat of neutral-cure silicone sealant over exposed components to insulate and protect delicate circuitry.
  • Recommended Product: Use AutoStar Germany Multi-Purpose Silicone Sealant, which offers excellent adhesion to non-porous materials like glass and plastic.

💡 For more insights into proper application techniques, see our detailed blog on Pro Tips for Applying Silicone Sealants.

Enhancing LED Lighting

Silicone sealants are widely used to encapsulate LED lights, protecting them from external damage while ensuring optimal performance.

  • Key Benefits: Maintains clarity, prevents moisture ingress, and offers long-term stability in high-heat environments.

Creative DIY Projects with Silicone Sealants

Silicone sealant mold used to create vibrant resin art coasters.

Crafting Molds for Resin Art

Silicone sealants can be used to create custom molds for resin projects, thanks to their flexibility and easy release properties.

  • How To: Apply the sealant to a clean, smooth surface and shape it into the desired mold. Once cured, pour resin into the mold for perfect results.
  • Pro Tip: Opt for clear silicone sealants for transparent molds that are easy to inspect during use.

💡 Did you know that silicone sealants also excel in industrial applications? Learn more in our blog on Top Benefits of Silicone Sealants.

Making Non-Slip Surfaces

Want to make household items like rugs or cutting boards safer? Apply small dots of silicone sealant to create a grippy, non-slip base.

Automotive Innovations with Silicone Sealants

Silicone sealant applied to a car engine for custom gasket sealing.

Custom Gasket Creation

In automotive repairs, silicone sealants are ideal for forming in-place gaskets that adapt to unique surfaces and offer a secure seal.

  • Applications: Seal engine components, windshields, and weatherstripping for a reliable, long-lasting bond.
  • Recommended Product: AutoStar Germany Windscreen Bonding Glue is the perfect choice for automotive repairs, offering a high-strength bond for critical components.

💡 If you’re working on windscreen repairs, don’t miss our Guide to Windscreen Bonding Glue.

Soundproofing Vehicle Interiors

Reduce road noise and improve passenger comfort by sealing gaps in the vehicle interior with silicone sealant.

  • How To: Apply a bead along door seals, window edges, and other areas prone to vibrations or air leaks.

💡 Interested in exploring more automotive adhesive options? Check out our blog on Adhesives in Automotive Repairs.

Heat and Cold Resistance in Industrial Applications

High-temperature industrial oven sealed with silicone sealant for durability.

One of the standout features of silicone sealants is their ability to withstand extreme temperatures. From freezing cold to scorching heat, they maintain their performance without cracking or degrading.

  • Applications:
    • Industrial Machinery: Protect components exposed to high temperatures or harsh environments.
    • Kitchen Appliances: Seal gaps around ovens, stoves, and heat-emitting equipment.
  • Recommended Product: AutoTech High-Temperature Silicone Sealant, capable of withstanding temperatures up to 400°F.

💡 For outdoor sealing projects exposed to temperature extremes, read our blog on Weatherproofing with Silicone Sealants.

FAQs About Innovative Uses of Silicone Sealants

Q1: Can silicone sealants be used in high-temperature electronics?
Yes, high-temperature silicone sealants are suitable for electronic applications exposed to heat, such as LED lights or industrial machinery.

Q2: Are silicone sealants safe for crafting projects?
Most silicone sealants are non-toxic once cured, making them ideal for DIY projects like mold-making or creating non-slip surfaces.

Q3: How do I choose the right silicone sealant for my project?
Match the sealant to the specific needs of your project. For example, use mold-resistant products for bathrooms, UV-resistant sealants for outdoor applications, and high-temperature variants for kitchen or automotive repairs.

Q4: Can I paint over silicone-sealed surfaces?
Standard silicone sealants are not paintable. If you need to paint over sealed areas, opt for hybrid sealants designed for this purpose.

💡 For information on maintaining your silicone sealants after application, see our post on How to Maintain and Extend the Life of Silicone Sealants.

Conclusion

Silicone sealants are far more versatile than most people realize. From electronics and automotive repairs to creative DIY projects and industrial applications, they deliver exceptional performance across a range of specialized tasks.

By choosing the right product for your project, you can achieve professional results that last. Explore our premium range of silicone sealants, including the AutoStar Germany Multi-Purpose Silicone Sealant and AutoStar Germany Windscreen Bonding Glue, to take your projects to the next level.

💡 For more expert tips, visit Autoglass Solutions, a trusted resource for automotive sealing techniques.

A sunny outdoor patio featuring well-sealed window frames and siding, showcasing unmatched durability and resistance to weather elements.

The Essential Guide to Using Silicone Sealants in Everyday Projects

Silicone sealants are the unsung heroes of countless DIY and professional projects. Known for their waterproofing, flexibility, and durability, they play a pivotal role in maintaining homes, repairing vehicles, and supporting industrial applications.

But what makes silicone sealants such a go-to solution, and how can you use them effectively? This guide provides all the answers, from everyday applications to pro-level tips for flawless results.

💡 Pro Tip: If you’re new to using silicone sealants, check out How to Remove Old Silicone Sealant Safely before starting your next project.

Why Silicone Sealants Are Essential

Silicone sealants stand out due to their unique combination of properties, making them indispensable for various uses.

Key Benefits Include:

Bathroom sink with water droplets, showcasing a smooth waterproof seal.
  • Waterproofing: Perfect for bathrooms, kitchens, and outdoor areas.
  • Durability: Resistant to UV rays, high temperatures, and chemicals.
  • Flexibility: Remains elastic to accommodate material movement and prevent cracking.
  • Adhesion: Bonds to materials like glass, metal, plastic, and ceramic.

💡 Related Blog: Explore The Top Benefits of Silicone Sealants to learn why they’re a favorite across industries.

A sunny outdoor patio featuring well-sealed window frames and siding, showcasing unmatched durability and resistance to weather elements.

Everyday Uses for Silicone Sealants

1. Sealing Bathrooms and Kitchens

Close-up of a sealed window frame showing slight material expansion, highlighting the exceptional flexibility of the sealant for adapting to seasonal changes.

Bathrooms and kitchens are areas prone to water exposure, making waterproof sealants essential.

Applications:

  • Sealing around bathtubs, sinks, and shower enclosures.
  • Protecting countertops and backsplashes from water damage.

💡 Best Practice: Use a mold-resistant sealant like OPTIMUS Waterproof Silicone Sealant for areas exposed to moisture.

2. Weatherproofing Outdoor Projects

Silicone sealants are designed to handle harsh outdoor conditions, including sunlight, rain, and temperature changes.

Examples:

  • Sealing window frames and siding.
  • Waterproofing gutters and roofing materials.
  • Protecting outdoor furniture joints.

💡 Learn More: Check out Weatherproofing with Silicone Sealants: Tips for Success to get started.

3. Automotive Repairs

In automotive applications, silicone sealants provide durability and heat resistance, making them suitable for:

  • Bonding windshields and sealing car windows.
  • Repairing engine parts exposed to high temperatures.
  • Fixing body panel seams.

💡 Product Recommendation: Use AutoStar Germany Windscreen Bonding Glue for secure and lasting windshield repairs.

💡 Read More: Discover more in our Guide to Windscreen Bonding Glue.

4. Industrial and Construction Projects

Construction site with heavy equipment and workers, showcasing the importance of sealants in building durable and weather-resistant structures.

Silicone sealants also find their place in heavy-duty industrial applications:

  • Sealing gaps in machinery to prevent leaks.
  • Filling expansion joints in buildings.
  • Protecting electrical components from water damage.

Their chemical resistance and high heat tolerance make them ideal for demanding environments.

Common Mistakes to Avoid When Using Silicone Sealants

Mistake 1: Neglecting Surface Preparation

Applying silicone on dirty or greasy surfaces results in poor adhesion. Always clean and dry the surface beforehand.

💡 Related Blog: Learn how to Apply Silicone Sealants Like a Pro.

Mistake 2: Using the Wrong Sealant

Not all silicone sealants are created equal. For example:

  • Bathrooms require mold-resistant formulas.
  • Outdoor projects need UV-resistant products.
  • High-temperature applications demand heat-resistant sealants.

💡 Read More: Choosing the Best Silicone Sealant for Any Project.

Expert Tips for Flawless Silicone Sealant Application

Step 1: Prepare the Surface

Remove old sealant, clean the area, and dry it thoroughly before applying new silicone.

Step 2: Apply Evenly

Use a high-quality caulking gun to lay a consistent bead of sealant.

Step 3: Smooth the Bead

Within 5–10 minutes, smooth the sealant using a damp finger or a professional smoothing tool.

💡 Pro Tip: Work in small sections to avoid rushed application as silicone begins curing when exposed to air.

Choosing the Right Silicone Sealant for Your Project

Selecting the right silicone sealant depends on your specific needs:

  • Bathrooms and Kitchens: Use waterproof and mold-resistant products.
  • Outdoor Projects: Opt for UV-resistant silicone sealants.
  • Automotive Repairs: Choose heat-resistant products like AutoStar Germany Windscreen Glue.

💡 Learn More: Visit The Ultimate Guide to Silicone Sealants for a detailed breakdown.

FAQs About Silicone Sealants

Q1: How long do silicone sealants last?
High-quality silicone sealants can last 10–20 years with proper maintenance.

Q2: Can silicone sealants be used outdoors?
Yes, but ensure you choose UV-resistant formulas for durability.

Q3: Are silicone sealants paintable?
No, silicone sealants are not paintable. For painted finishes, consider acrylic sealants.

Q4: What’s the best way to apply silicone sealants?
Clean the surface, apply evenly with a caulking gun, and smooth the bead for a professional finish.

Q5: How do I remove old silicone sealant?
Use a scraper or silicone remover to lift old residue before cleaning and reapplying.

Conclusion

Silicone sealants are a must-have for waterproofing, bonding, and protecting surfaces across various applications. By avoiding common mistakes, following expert tips, and selecting the right sealant, you can achieve professional-grade results that last for years.

💡 Start Today: Browse our Silicone Sealant Collection to find the perfect solution for your project!

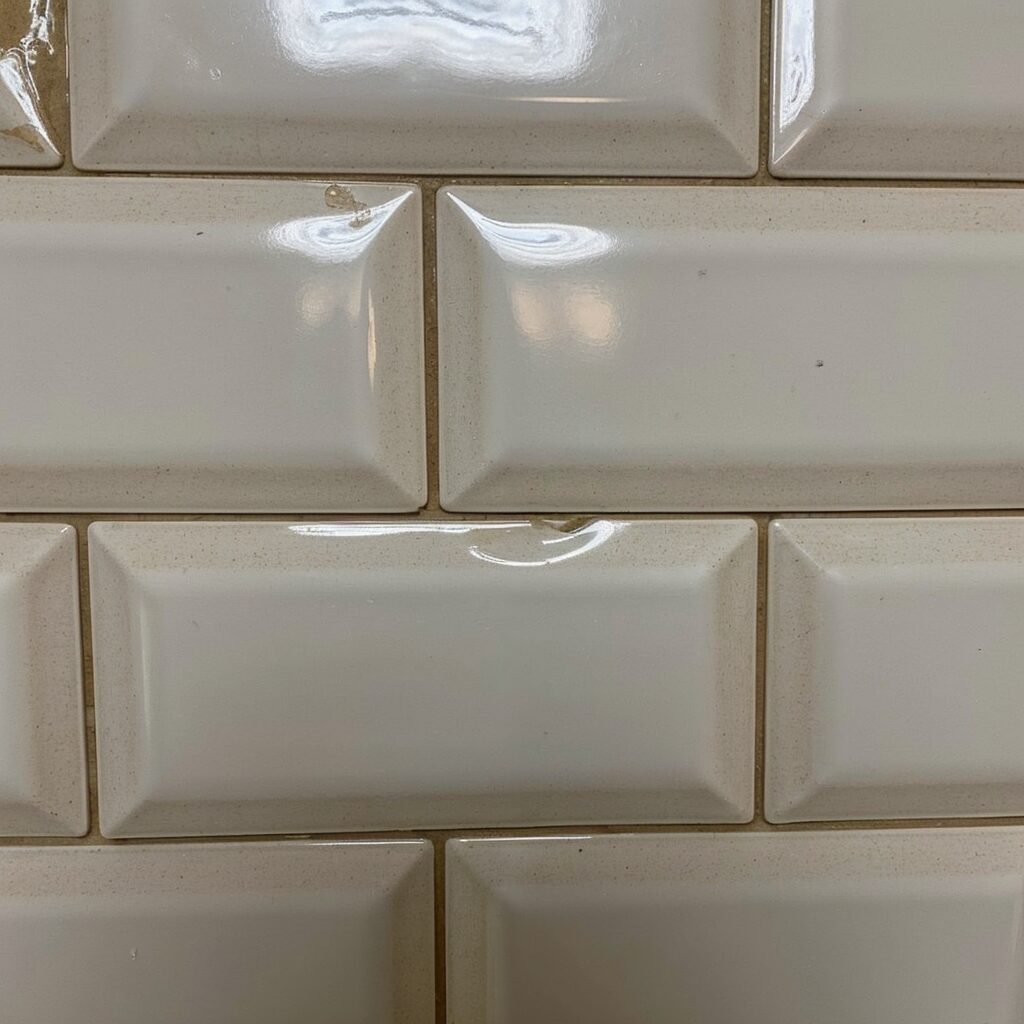
"Clean kitchen backsplash with mold-free sealed joints.

Top Benefits of Silicone Sealants for Home and Industrial Projects

Silicone sealants have become an indispensable tool for homeowners, DIY enthusiasts, and professionals alike. Known for their unmatched durability, flexibility, and water resistance, silicone sealants can be used in everything from bathrooms and kitchens to industrial machinery. But what makes them so valuable for these projects?

In this guide, we’ll explore the top benefits of silicone sealants, explaining why they are the go-to choice for sealing, bonding, and protecting various surfaces.

1. Superior Water Resistance

Silicone sealants excel in waterproofing applications. They create a watertight bond that prevents moisture from seeping into gaps and cracks.

Clean and waterproof bathtub sealed with silicone sealant to prevent leaks and mold buildup.

Where It’s Most Useful

  • Bathrooms: Sealing around sinks, bathtubs, and shower enclosures.
  • Kitchens: Protecting countertops and backsplashes from water damage.
  • Outdoors: Gaps around windows, siding, and gutters.

💡 Pro Tip: Use OPTIMUS Waterproof Silicone Sealant for areas exposed to moisture. Its mold-resistant formula ensures long-lasting performance in wet environments.

2. Unmatched Durability and Longevity

Silicone sealants offer impressive resistance to extreme temperatures, UV light, and chemicals. Unlike other sealants, they remain intact and flexible for years.

Why It Matters

  • Lasts up to 20 years with proper application.
  • Withstands high and low temperatures without cracking.
  • Resists UV rays, making it perfect for outdoor applications.

3. Exceptional Flexibility

Unlike rigid sealants, silicone remains elastic after curing. This flexibility allows it to adapt to material movements, expansion, and contractions without breaking.

Common Applications

  • Windows and Doors: Handles seasonal temperature changes.
  • Automotive Repairs: Sealing windscreen edges that endure constant vibration.
  • Roof Repairs: Provides reliable sealing against environmental stresses.

4. Strong Adhesion to Various Surfaces

Sealed window edges with clean joints.

Silicone sealants adhere to a wide variety of materials, including:

  • Glass
  • Metal
  • Ceramic
  • Plastic
  • Wood

This versatility makes silicone sealants suitable for residential, commercial, and industrial projects.

5. Resistant to Mold and Mildew

Clean bathroom tiles free of mold and mildew.

Bathrooms and kitchens are prone to mold growth due to excess moisture. Mold-resistant silicone sealants offer a clean and hygienic solution that reduces the risk of fungal growth.

💡 Awesome Product: Try AutoStar Germany Multi-Purpose Silicone Sealant for a mold-resistant, easy-to-apply solution.

"Clean kitchen backsplash with mold-free sealed joints.

6. Heat and Cold Resistance

Silicone sealants can withstand extreme temperatures, ranging from -40°C to 200°C, making them ideal for:

  • Kitchen Applications: Sealing ovens, stoves, and countertops.
  • Automotive Repairs: Sealing engine parts exposed to heat.
  • Industrial Machinery: Protecting components in high-heat environments.

7. Easy Application for DIY and Professionals

Silicone sealants are easy to apply with a standard caulking gun, making them accessible for DIY enthusiasts and professionals.

Steps for a Perfect Application

  1. Prepare the Surface: Clean the area thoroughly to remove dust and debris.
  2. Apply Evenly: Use a caulking gun to apply a consistent bead of sealant.
  3. Smooth the Seal: Use a smoothing tool or damp finger for a clean finish.

8. Cost-Effective Solution

Silicone sealants are a cost-effective investment thanks to their longevity and minimal maintenance. While they may have a higher upfront cost, they reduce the need for frequent repairs or replacements.

Long-Term Savings

  • Waterproofing prevents expensive water damage.
  • Durability minimizes repair costs.

9. Safe and Non-Toxic Options

Modern silicone sealants are non-toxic once cured, making them safe for household applications. Always check for low-odor and VOC-compliant formulas for indoor use.

10. Versatile for Indoor and Outdoor Use

Whether sealing a bathroom tile or bonding metal components outdoors, silicone sealants deliver excellent performance in all conditions.

Perfect for Projects Like

  • Home Repairs: Gaps around windows, bathtubs, and sinks.
  • Construction: Joint sealing for weatherproofing.
  • Automotive: Bonding windshields and sealing car windows.

FAQs About Silicone Sealants

Q1: How long do silicone sealants last?

High-quality silicone sealants can last 10–20 years, depending on the environment and proper maintenance.

Q2: Are silicone sealants waterproof?

Yes, silicone sealants provide a watertight bond, making them ideal for bathrooms, kitchens, and outdoor applications.

Q3: Can silicone sealants withstand heat?

Absolutely! Heat-resistant silicone sealants can endure temperatures up to 200°C, making them perfect for ovens, stoves, and engine repairs.

Q4: How do I apply silicone sealants like a pro?

Prepare the surface, use a quality caulking gun, apply evenly, and smooth the seal with a tool for professional results.

Q5: Which silicone sealant is best for bathrooms?

Mold-resistant products like OPTIMUS Waterproof Silicone Sealant are best for high-moisture areas.

Conclusion

Silicone sealants offer unmatched durability, water resistance, and versatility, making them ideal for a variety of applications. Whether you’re sealing a bathroom, weatherproofing windows, or repairing automotive components, choosing the right silicone sealant ensures long-lasting, professional results.

Ready to get started?
Explore our premium Silicone Sealant Collection for high-quality solutions tailored to your project needs.
🔗 External Resource: Proper Way to Seal a Windshield

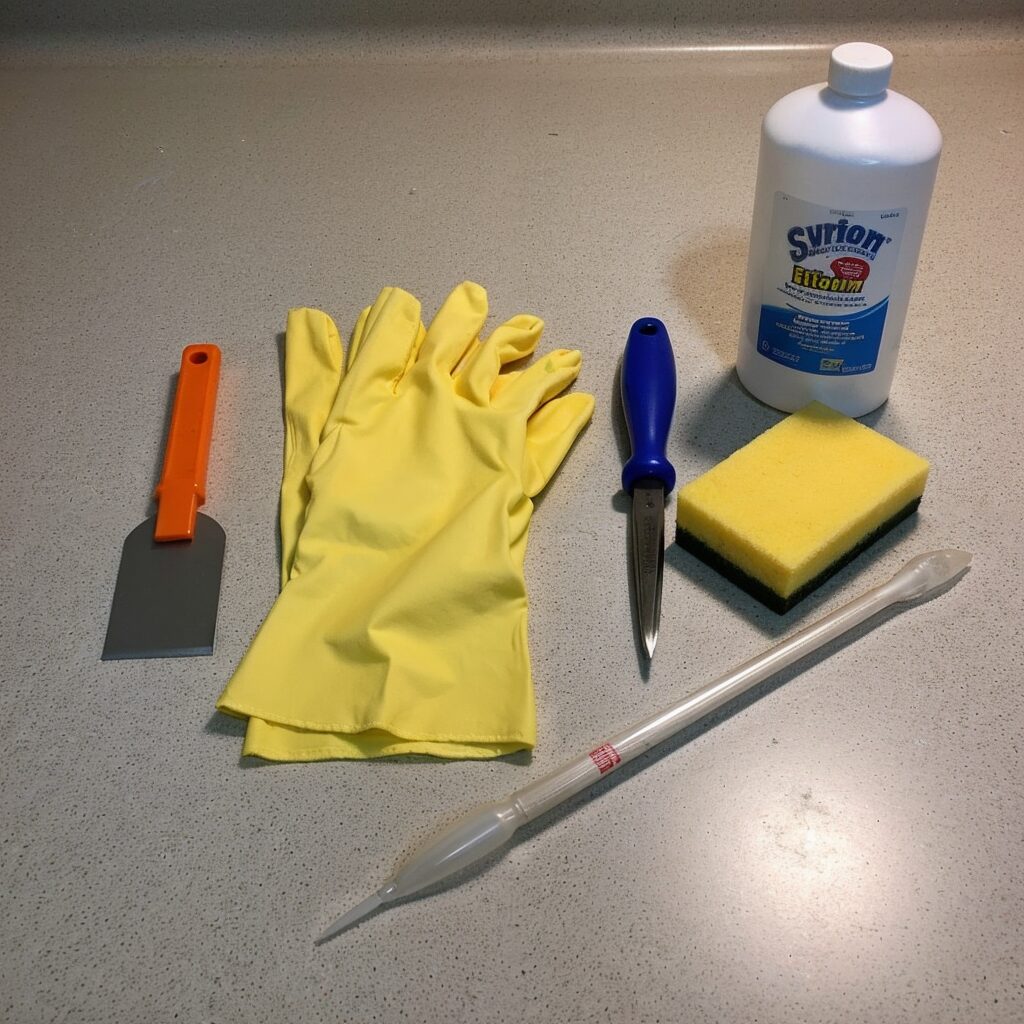
Essential tools for silicone sealant removal, including gloves, a scraper, and rubbing alcohol.

How to Remove Old Silicone Sealant Safely: A Comprehensive Guide

Removing old silicone sealant can be a tricky task, but it’s an essential step to ensure a clean surface for new sealant application. When you have to remove old silicone whether you’re working on a bathroom, kitchen, or outdoor project, proper removal techniques will help you achieve a durable and professional finish. This guide covers everything you need to know about safely removing old silicone sealant, from tools and methods to expert tips for avoiding damage.

Why Removing Old Silicone Sealant Is Important

Old or failing silicone sealant can lead to:

  • Mold and Mildew Growth: Over time, sealants can harbor bacteria and fungi, especially in moist environments like bathrooms. Learn how to prevent mold by reading How to Maintain and Extend the Life of Silicone Sealants.
  • Poor Adhesion: Applying new silicone over old sealant compromises its bonding strength and durability.
  • Aesthetic Issues: Cracked or peeling sealant detracts from the overall appearance of your project.

Tools You'll Need for Removing Silicone Sealant

Essential tools for silicone sealant removal, including gloves, a scraper, and rubbing alcohol.

Before you begin, gather the right tools to ensure a clean and damage-free removal process:

Essential Tools

  • Silicone Sealant Remover: A chemical solution designed to soften old silicone for easy removal.
  • Utility Knife or Razor Blade Scraper: For cutting and peeling away larger chunks of sealant.
  • Plastic Scraper: Ideal for delicate surfaces to avoid scratches.
  • Rubbing Alcohol or Acetone: To clean residue after the sealant is removed.
  • Protective Gloves: To protect your hands from chemicals and sharp tools.
  • Cloth or Sponge: For wiping and cleaning surfaces.

Optional Tools

  • Heat Gun: Useful for loosening sealant in cold conditions.
  • Toothbrush or Small Brush: To clean hard-to-reach areas.

For more on the essential tools needed for any silicone project, check out our guide Top 7 Applications of Silicone Sealants.

Step-by-Step Guide to Removing Old Silicone Sealant

Step 1: Soften the Silicone

  1. Apply Silicone Remover: Use a commercial silicone remover (e.g., Everbuild Sealant Remover) on the old sealant. Follow the manufacturer’s instructions for application time, typically 30 minutes to an hour.
  2. Let It Sit: Allow the remover to penetrate the sealant, softening it for easier removal.

Step 2: Cut and Peel Away the Silicone

  1. Use a Utility Knife: Carefully slice along the edges of the silicone bead to loosen it from the surface.
  2. Peel Slowly: Use your fingers or a plastic scraper to lift the sealant. Avoid pulling too hard, as this can damage the underlying surface.

Step 3: Scrape Residual Sealant

  1. Switch to a Plastic Scraper: Remove remaining bits of silicone gently, especially on sensitive surfaces like tiles, glass, or aluminum.
  2. Use a Heat Gun (Optional): Warm the sealant slightly to make it more pliable, but be cautious not to overheat and damage the surface.

Step 4: Clean the Surface

Cleaning a surface with a yellow sponge before applying silicone sealant.
  1. Apply Rubbing Alcohol or Acetone: Wipe the surface with a cloth or sponge dipped in rubbing alcohol to dissolve any leftover residue.
  2. Dry Thoroughly: Ensure the area is completely dry before applying new silicone sealant.

Pro Tips for Safe and Effective Silicone Removal

  • Use the Right Tools for the Surface: Avoid metal scrapers on delicate materials like glass or ceramics to prevent scratches.
  • Test in a Small Area First: When using a chemical remover, test it on a hidden area to ensure it doesn’t damage the surface.
  • Work in Sections: Focus on small areas at a time to maintain control and avoid spreading softened sealant.
  • Replace Blades Frequently: A dull blade can damage surfaces and make removal more difficult.
  • Ventilate the Area: When using chemicals or heat, ensure proper ventilation to avoid inhaling fumes.

For more in-depth advice on application techniques and troubleshooting, check out Pro Tips for Applying Silicone Sealants.

Common Mistakes to Avoid During Silicone Removal

  • Skipping Surface Preparation: Always clean surfaces thoroughly before applying new silicone. Read our Guide to Silicone Sealant Lifespan to understand how preparation impacts durability.
  • Using Harsh Tools: Avoid using abrasive tools that can damage surfaces.
  • Neglecting Safety Precautions: Always wear gloves and work in well-ventilated areas when using chemical removers.

FAQs About Silicone Sealant Removal

Q: How long does it take to remove old silicone sealant?
A: The process typically takes 1–2 hours, depending on the size of the area and the tools used.

Q: Can I apply new silicone over old sealant?
A: No, always remove old sealant to ensure proper adhesion and a clean finish.

Q: Is it safe to use a utility knife on tiles or glass?
A: Yes, but use it carefully and avoid excessive force to prevent scratches or damage.

For more FAQ answers, explore How to Maintain and Extend the Life of Silicone Sealants.

Conclusion

Modern tiled bathroom wall with clean grout lines sealed using silicone sealant.

Removing old silicone sealant is a vital step for ensuring long-lasting and professional results. With the right tools, techniques, and products, you can prepare your surfaces effectively for new applications. Whether you’re resealing a bathroom, kitchen, or outdoor project, following this guide will help you achieve a flawless finish.

💡 Ready to get started? Browse our Silicone Sealant Collection to find the perfect product for your next project. For additional advice on the best sealants for your needs, check out How to Choose the Best Silicone Sealant.

Damaged car window with text overlay reading 'Time to Replace?' emphasizing the need for replacement when cracks exceed repair limits.

Car Window Maintenance: Top Tips for Repair and Long-Lasting Care

Car window maintenance is vital for the safety, performance, and appearance of your vehicle. From repairing cracks to ensuring a leak-free windshield, proper care can save you money and extend the lifespan of your car windows. Whether you’re a car owner or a professional in automotive repair, understanding the nuances of car window maintenance ensures long-lasting results and avoids costly replacements.

This guide delves into effective tips, common mistakes to avoid, and recommended products to help you keep your car windows in pristine condition.

Why Car Window Maintenance is Essential

Car windows do more than just keep the wind out—they play a key role in maintaining visibility, protecting the interior, and enhancing the structural integrity of your vehicle. Neglecting proper maintenance can lead to a host of issues, including safety hazards and costly repairs.

Key Benefits of Regular Car Window Maintenance

  1. Enhanced Safety: Clear and well-maintained windows reduce the risk of accidents caused by poor visibility.
  2. Protection Against Leaks: Proper sealing prevents water leaks that can damage the interior.
  3. Extended Lifespan: Regular care minimizes wear and tear, ensuring windows remain functional for years.
  4. Improved Aesthetics: Clean and crack-free windows keep your car looking its best.

💡 Pro Tip: Regularly inspect your car windows for signs of damage, especially after extreme weather conditions or accidents.

Common Problems in Car Window Maintenance

Identifying and addressing problems early can save you time and money. Here are the most common issues car owners face:

1. Cracks and Chips

Close-up of a car windshield with a visible chip caused by flying debris, highlighting the importance of timely repairs.

Minor cracks or chips can quickly worsen if not addressed, compromising the integrity of the glass.
Solution: Use a high-quality adhesive like AutoStar Germany Windscreen Bonding Glue to repair minor damages.

2. Leaks and Condensation

Improper sealing can cause water to seep into your car, leading to mold and interior damage.
Solution: Ensure all seals are intact and apply a waterproof adhesive to fix leaks.

3. Scratches on the Glass

Scratches reduce visibility and can worsen over time.
Solution: Use a glass polishing kit to buff out minor scratches, and avoid abrasive cleaning tools.

Top Tips for Effective Car Window Maintenance

Taking the right steps can help you maintain your car windows efficiently:

1. Clean Windows Regularly

Dirt and grime can cause scratches and damage the seals.

  • Use a non-abrasive glass cleaner.
  • Avoid harsh chemicals that may damage the tint or seals.

2. Inspect Seals Frequently

Look for signs of wear or peeling on the rubber seals.

  • If seals are damaged, reapply adhesive to prevent leaks.
  • Use a weatherproof sealant for long-lasting results.

3. Repair Chips and Cracks Immediately

Damaged car window with text overlay reading 'Time to Replace?' emphasizing the need for replacement when cracks exceed repair limits.

Even small cracks can spread, especially in extreme temperatures.

4. Protect Against Extreme Weather

Foggy car window from inside a vehicle, highlighting reduced visibility and the need for anti-fog treatments.

Heat and cold can weaken glass and seals over time.

  • Park in shaded areas or use a windshield cover.
  • Apply UV-resistant treatments to reduce sun damage.

Recommended Products for Car Window Maintenance

Choosing the right products ensures effective and long-lasting maintenance.

This high-performance adhesive is ideal for repairing cracks, securing seals, and ensuring a durable bond.

  • Suitable for windshields and car windows.
  • Resistant to moisture, UV rays, and extreme temperatures.

💡 Where to Buy: For detailed guidance on windshield sealing, visit Auto Glass Solutions.

How to Use AutoStar Germany Windscreen Bonding Glue

Follow these steps for a professional-grade application:

  1. Clean the Surface: Remove dirt, grease, or residue from the affected area using rubbing alcohol.
  2. Prepare the Glue: Cut the nozzle at a 45-degree angle for precise application.
  3. Apply Evenly: Use a caulking gun to apply a thin, even layer of glue.
  4. Let it Cure: Allow 24–48 hours for the adhesive to cure fully before exposing it to water or stress.

💡 Pro Tip: Always follow the manufacturer’s instructions for the best results.

Common Mistakes to Avoid

1. Using the Wrong Adhesive

Not all adhesives are suitable for car windows. Choose a specialized product like AutoStar Germany Windscreen Bonding Glue for reliable results.

2. Ignoring Surface Preparation

Applying adhesive to dirty or wet surfaces leads to poor bonding. Always clean and dry the surface beforehand.

3. Rushing the Curing Process

Premature use of the window can weaken the bond. Allow adequate curing time to ensure durability.

FAQs About Car Window Maintenance

Q: How often should I inspect my car windows?

A: Inspect your car windows every three months or after any extreme weather conditions.

Q: Can I repair a windshield crack myself?

A: Yes, small cracks can be repaired with high-quality adhesive, but larger cracks may require professional assistance.

Q: How do I prevent water leaks in my car?

A: Ensure all seals are intact and apply waterproof adhesives to fix any gaps or damage.

Q: Is it necessary to replace damaged seals immediately?

A: Yes, delaying seal repairs can lead to water damage and costly replacements.

Conclusion: Maintain Your Car Windows Like a Pro

Proper car window maintenance is essential for safety, aesthetics, and long-lasting performance. By following these tips, using high-quality products like AutoStar Germany Windscreen Bonding Glue, and avoiding common mistakes, you can ensure your car windows remain in top condition.

💡 Start Now: Explore our Silicone Sealant Collection for high-quality adhesives and sealants tailored to your needs.

A mechanic in a professional workshop pressing a newly bonded windscreen into place using suction cups for precise alignment.

The Role of Adhesives in Automotive Repairs: More Than Just Windscreens

Adhesives are one of the most versatile and indispensable tools in automotive repairs. While they are widely recognized for their role in windscreen bonding, their applications extend far beyond glass installation. From sealing car body panels to attaching trims and mirrors, high-quality adhesives are essential for ensuring safety, durability, and aesthetics in vehicle repairs.

This guide explores the significance of adhesives in automotive repairs, their diverse applications, and tips for choosing the right product to achieve long-lasting results.

Why High-Quality Adhesives in Automotive Repairs Matter

A professional mechanic carefully applying windscreen bonding adhesive to a car windscreen using a caulking gun in a workshop setting.

High-quality adhesives are more than just a convenience—they are critical for vehicle integrity. Whether you’re performing a DIY repair or handling professional maintenance, the adhesive you choose has a direct impact on:

  • Safety: Proper bonding prevents components from detaching under stress, reducing the risk of accidents.
  • Durability: High-quality adhesives resist environmental factors like temperature fluctuations, UV exposure, and moisture, ensuring longer-lasting repairs.
  • Cost Savings: Using the right adhesive reduces the need for frequent repairs, saving time and money in the long run.

💡 Pro Tip: Investing in adhesives specifically designed for automotive applications such as Autostar Germany Windscreen Adhesive can prevent common issues like peeling, cracking, or weak bonds that may occur with generic products.

Key Applications of Automotive Adhesives

1. Windscreen Bonding

A mechanic in a professional workshop pressing a newly bonded windscreen into place using suction cups for precise alignment.

Windscreen adhesives are among the most critical in the automotive industry. They ensure that the glass remains securely attached, providing structural integrity and protection from water leaks.

  • Why It’s Important: Windscreens play a key role in vehicle safety by supporting airbags during deployment and reinforcing the car’s overall structure.
  • Best Product Recommendation: AutoStar Germany Windscreen Glass Sealant offers high bonding strength and UV resistance, ensuring durability even in extreme conditions.

🔗 Related Blog: Guide to Windscreen Bonding Glue

2. Sealing Car Body Panels

Adhesives are used to seal gaps between car body panels, protecting against water infiltration, corrosion, and air leaks.

  • Why It’s Important: Proper sealing improves aerodynamics, reduces noise, and protects the vehicle’s interior from environmental damage.
  • Pro Tip: Use adhesives with weatherproofing properties for long-term performance.

3. Attaching Trim and Mirrors

Adhesives are commonly used for attaching exterior trims, side mirrors, and badges to vehicles.

  • Why It’s Important: They eliminate the need for mechanical fasteners, providing a clean and seamless appearance.
  • Recommended Adhesive: Opt for a flexible, durable adhesive that withstands vibrations and temperature changes.

4. Fixing Interior Components

Adhesives are also vital for repairing dashboards, door panels, and other interior components.

  • Why It’s Important: High-quality adhesives ensure that interior parts remain securely attached, even under constant use.
  • Best Practice: Choose an adhesive compatible with plastic, leather, or fabric surfaces as required.

Benefits of High-Quality Adhesives

Using premium adhesives for automotive repairs offers several benefits:

  1. Longevity: High-quality adhesives maintain their bond strength over time, even in harsh conditions.
  2. Versatility: A single adhesive can bond multiple materials, including glass, metal, plastic, and rubber.
  3. Aesthetic Appeal: Advanced adhesives create neat, seamless finishes that enhance the vehicle’s appearance.
  4. Ease of Use: Modern formulations are easy to apply and cure quickly, saving time on repairs.

Types of Adhesives for Automotive Use

Understanding the different types of adhesives is key to choosing the right one for your project:

1. Silicone-Based Adhesives

  • Best For: Weatherproofing and flexible bonding applications.
  • Example: Sealing sunroofs or attaching lightweight trims.

2. Epoxy Adhesives

  • Best For: Heavy-duty bonding and structural repairs.
  • Example: Fixing cracked metal or repairing bumpers.

3. Polyurethane Adhesives

  • Best For: Structural applications like windscreen bonding.
  • Example: AutoStar Germany Windscreen Glass Sealant provides high strength and UV resistance.

Tips for Choosing the Right Automotive Adhesive

Match the Adhesive to the Material:

  • Use silicone-based adhesives for flexible joints and polyurethane for rigid bonding.

Consider Environmental Factors:

  • Opt for UV-resistant adhesives for outdoor applications and waterproof adhesives for areas prone to moisture.

Read Product Specifications:

  • Look for details like cure time, temperature tolerance, and bonding strength on the label.
      •  

Frequently Asked Questions (FAQs)

Q: Can I use a multipurpose adhesive for automotive repairs?
A: While multipurpose adhesives may work for minor fixes, specialized adhesives offer better performance and durability for automotive applications.

Q: How long do automotive adhesives take to cure?
A: Curing time varies by product, but most adhesives require 24–48 hours for full strength. Always check the manufacturer’s guidelines.

Q: Can I remove and reapply adhesives?
A: Yes, old adhesives can be removed using specialized adhesive removers or a scraper. Clean the surface thoroughly before reapplying.

Conclusion

Adhesives are the unsung heroes of automotive repairs, ensuring durability, safety, and aesthetics across various applications. By selecting high-quality products tailored to your specific needs, you can achieve professional results that stand the test of time.

🚗 Get Started Today: Explore our Silicone Sealant Collection to find the perfect adhesive for your next automotive project!

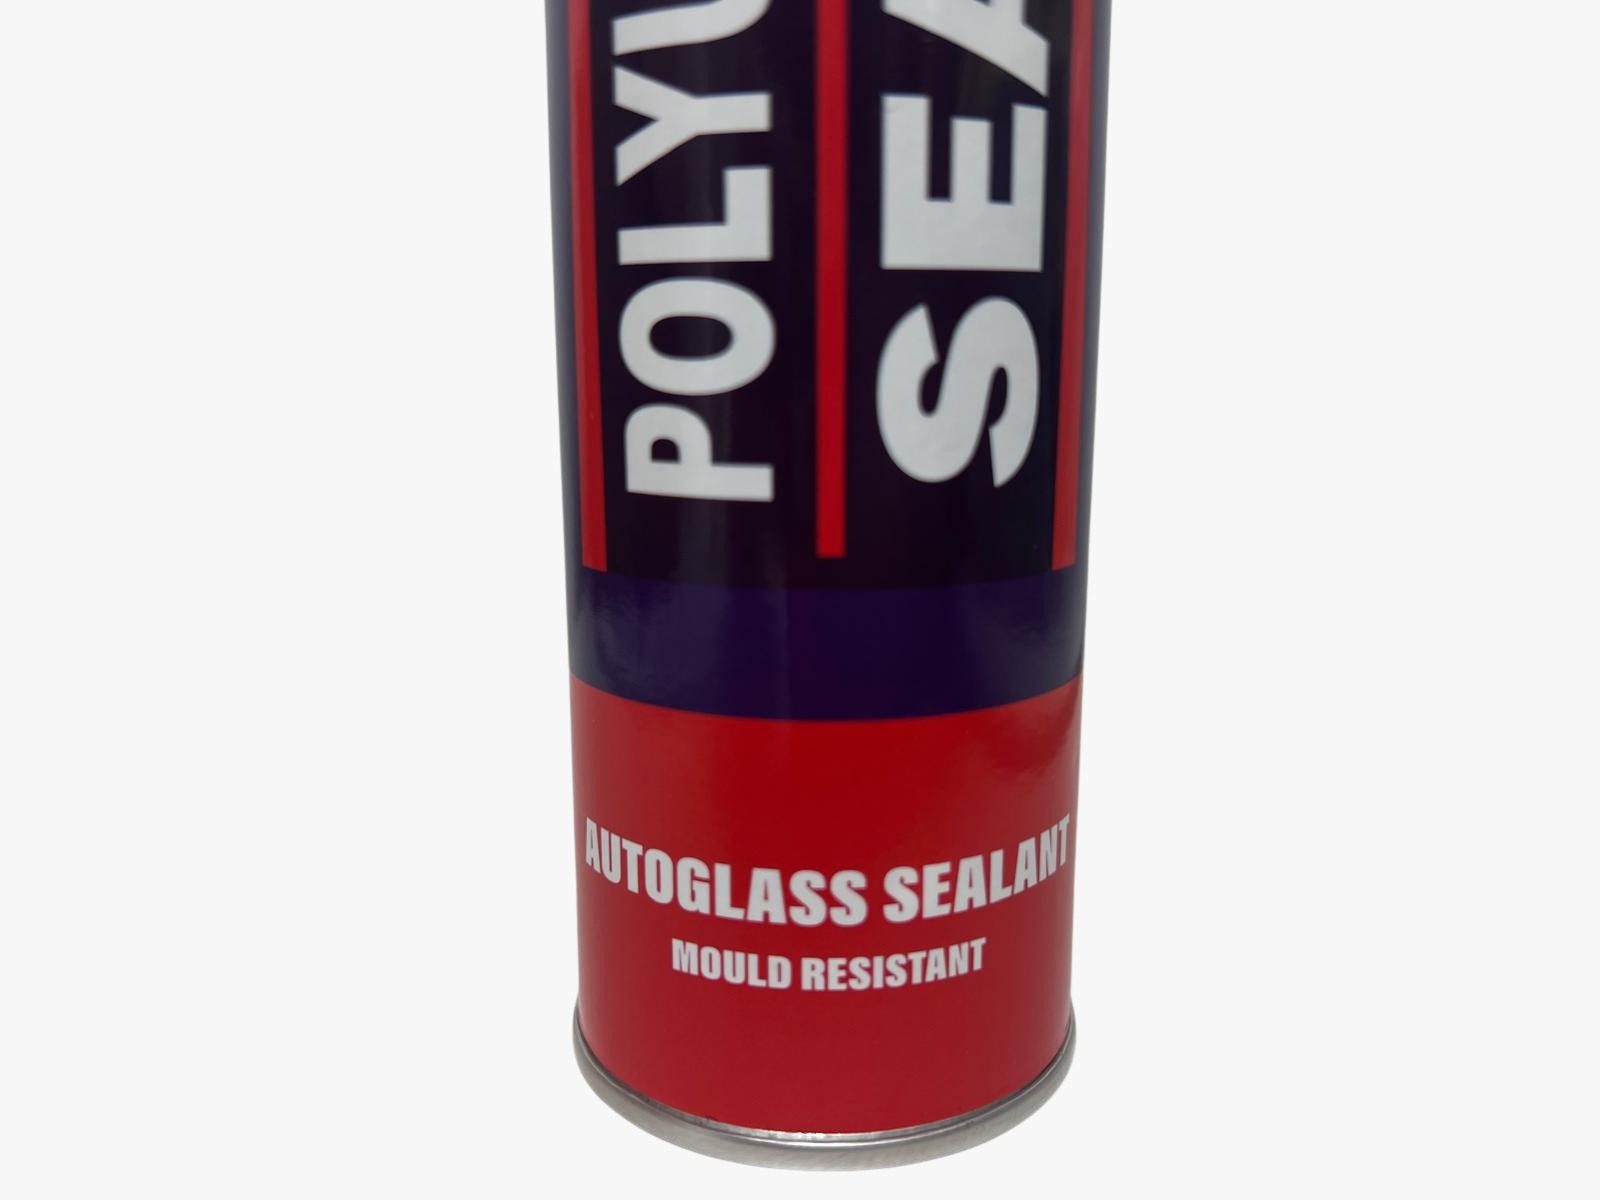
Close shoot of Windscreen Bonding Glue AutoStar Germany Windscreen Glass Sealant - Strong Bonding Silicone for Car Windows, 310ml

The Ultimate Guide to Windscreen Bonding Glue: Durable, Reliable, and Easy to Use

When it comes to replacing or repairing a car windscreen, the choice of adhesive is critical. Windscreen bonding glue is specially formulated to provide a strong, flexible, and long-lasting bond between the windscreen and the car frame, ensuring safety and durability in all driving conditions. Whether you’re a professional mechanic or a DIY enthusiast, understanding how to choose, apply, and maintain windscreen bonding glue can make all the difference.

In this guide, we’ll cover everything you need to know about windscreen bonding glue, including its benefits, applications, and tips for use. Plus, we’ll explore related silicone products to expand your knowledge of adhesives.

Why Windscreen Bonding Glue is Essential

Technician applying windscreen bonding glue to a car window with precision in a professional workshop.

A car’s windscreen is not just a shield against wind and debris—it plays a structural role in the vehicle’s safety, especially during collisions. Windscreen bonding glue ensures:

  1. Secure Bonding: Prevents windscreen displacement in case of an accident.
  2. Weather Resistance: Protects against leaks and keeps the car interior dry.
  3. Durability: Withstands vibrations, temperature changes, and prolonged wear and tear.
  4. Ease of Application: Designed for smooth application and quick curing.

Features of High-Quality Windscreen Bonding Glue

AutoStar Germany Windscreen Glass Sealant - Strong Bonding Silicone for Car Windows, 310ml

When selecting a windscreen bonding glue, look for these key features:

  1. Strong Adhesion: Bonds securely to glass, metal, and plastic frames.
  2. UV Resistance: Prevents degradation due to prolonged sun exposure.
  3. Flexibility: Absorbs vibrations and temperature changes without cracking.
  4. Quick Curing Time: Reduces the wait time for safe driving after installation.

💡 Pro Tip: Our AutoStar Germany Windscreen Bonding Glue combines all these features for professional-grade results.

How to Use Windscreen Bonding Glue Effectively

To achieve a secure and professional bond, follow these steps:

1. Prepare the Surface

  • Remove the old adhesive completely using a scraper or adhesive remover.
  • Clean the bonding area with a glass cleaner or alcohol to remove dirt, grease, and residue.

2. Apply the Glue

  • Cut the nozzle of the glue tube at a 45-degree angle for precise application.
  • Use a high-quality caulking gun to apply a continuous, even bead of glue along the edge of the windscreen.

3. Position the Windscreen

Technician installing a windscreen with bonding glue for secure adhesion and durability.
  • Carefully place the windscreen onto the car frame. Align it correctly before the adhesive begins to set.
  • Press firmly to ensure a uniform bond.

4. Allow Curing Time

Car windscreen repair in progress using bonding adhesive for a secure seal.
  • Follow the manufacturer’s instructions for curing. Most adhesives require 24 hours for a complete bond.
  • Avoid driving or exposing the vehicle to extreme weather during this time.

🔗 Related Post: For more tips on adhesive applications, check out  5 Essential Tips for Applying Silicone Sealant Like a Pro.

Common Mistakes to Avoid

Even the best windscreen bonding glue can fail if not applied correctly. Avoid these common errors:

  1. Skipping Surface Preparation: Failing to clean the surface can weaken the bond.
  2. Applying Too Much or Too Little Glue: Follow the recommended bead size for optimal bonding.
  3. Ignoring Curing Instructions: Prematurely driving the vehicle can compromise the adhesive.

Applications Beyond Windscreens

While primarily designed for windscreen installations, bonding glue can also be used for:

  • Window Repairs: Securing glass panes in RVs, trucks, and boats.
  • Plastic Bonding: Adhering plastic trim and panels.
  • Emergency Fixes: Temporary sealing of cracks and gaps in glass or metal surfaces.

💡 Pro Tip: For sealing applications that don’t require high-strength bonding, consider our AutoStar Germany Multi-Purpose Silicone Sealant.

Benefits of Using AutoStar Germany Windscreen Bonding Glue

Close shoot of Windscreen Bonding Glue AutoStar Germany Windscreen Glass Sealant - Strong Bonding Silicone for Car Windows, 310ml

Our AutoStar Germany Windscreen Bonding Glue stands out for its:

  1. Professional Quality: Trusted by mechanics for reliable performance.
  2. Ease of Use: Designed for smooth application with minimal tools.
  3. Weatherproofing: Protects against rain, wind, and UV rays.
  4. Cost-Effectiveness: Long-lasting results reduce the need for frequent repairs.

Maintenance Tips for Windscreen Bonding

To ensure the longevity of your bonded windscreen:

  1. Inspect the adhesive line regularly for cracks or peeling.
  2. Clean the windscreen and frame with mild detergents to prevent dirt buildup.
  3. Avoid harsh chemicals that can degrade the adhesive over time.

FAQs About Windscreen Bonding Glue

Q1: How long does windscreen bonding glue take to cure?

A: Most products, including AutoStar Germany Windscreen Bonding Glue, require 24 hours for complete curing. Refer to the product label for specific instructions.

Q2: Can I use windscreen bonding glue for side windows?

A: Yes, but ensure the adhesive is compatible with the materials of the side windows and the frame.

Q3: Is windscreen bonding glue waterproof?

A: Absolutely. High-quality products like ours are designed to create a watertight seal.

Conclusion: Choose the Right Windscreen Bonding Glue for Your Needs

Windscreen bonding glue is a vital tool for ensuring safety, durability, and comfort in your vehicle. By selecting a reliable product like AutoStar Germany Windscreen Bonding Glue and following proper application techniques, you can achieve professional results every time.

💡 Ready to get started? Explore our Windscreen Bonding Glue and other high-quality adhesives in our online store today.

Search for products

Back to Top
Product has been added to your cart