Silicone sealants are essential for sealing, bonding, and protecting surfaces in bathrooms, kitchens, and outdoor spaces. With their unmatched waterproofing, flexibility, and durability, they are the go-to solution for both DIYers and professionals. However, achieving long-lasting results depends on selecting the right sealant, applying it properly, and maintaining it over time.
In this guide, we’ll explore everything you need to know about silicone sealants, including choosing the best product for your project, application techniques, and expert tips for extending their lifespan.
Why Silicone Sealants Are Essential for Any Project
Silicone sealants offer several benefits that make them indispensable for various applications:
Key Benefits:
- Waterproofing: Keeps surfaces protected from moisture, mold, and mildew.
- Durability: Resists UV rays, extreme temperatures, and wear and tear.
- Flexibility: Adapts to material movements without cracking or losing adhesion.
- Versatility: Suitable for kitchens, bathrooms, outdoor projects, automotive repairs, and more.
💡 Pro Tip: For outdoor projects, always choose UV-resistant silicone sealants to ensure they withstand sun exposure and extreme weather conditions.
Learn more about Top Mistakes to Avoid When Applying Silicone Sealants.
How to Choose the Right Silicone Sealant
Selecting the right silicone sealant is crucial for achieving professional results. Here’s what to consider:
1. Application Area
- Bathrooms and Kitchens: Use mold-resistant silicone sealants like OPTIMUS Waterproof Silicone Sealant to prevent mildew and ensure durability in high-moisture areas.
- Outdoor Projects: For windows, roofs, and siding, select UV-resistant silicone sealants that can handle harsh weather.
- Automotive and Industrial: Use high-temperature silicone sealants for engine repairs or heavy-duty equipment.
Dive deeper into product recommendations in our Complete Guide to Silicone Sealants.
2. Material Compatibility
- Acid-Cure Silicone Sealants:
- Best for glass, ceramic, and other non-porous surfaces.
- Avoid using on metals as they may corrode.
- Neutral-Cure Silicone Sealants:
- Ideal for sensitive materials like aluminum, marble, or concrete.
- Perfect for construction and automotive use.
3. Environmental Conditions
Sealants need to be tailored to the environment:
- High Moisture: Bathrooms and kitchens need waterproof, mold-resistant products.
- UV Exposure: Outdoor sealants should resist cracking and discoloration from sunlight.
- Extreme Temperatures: Use heat-resistant sealants for ovens, stovetops, or areas prone to freezing.
💡 Pro Tip: Match your sealant to the material and environment for optimal results.
Step-by-Step Guide to Applying Silicone Sealants
1. Prepare the Surface
- Clean Thoroughly: Remove old sealant, dirt, grease, and debris.
- Dry Completely: Moisture can compromise adhesion.
2. Apply the Sealant
- Cut the nozzle at a 45-degree angle for precise application.
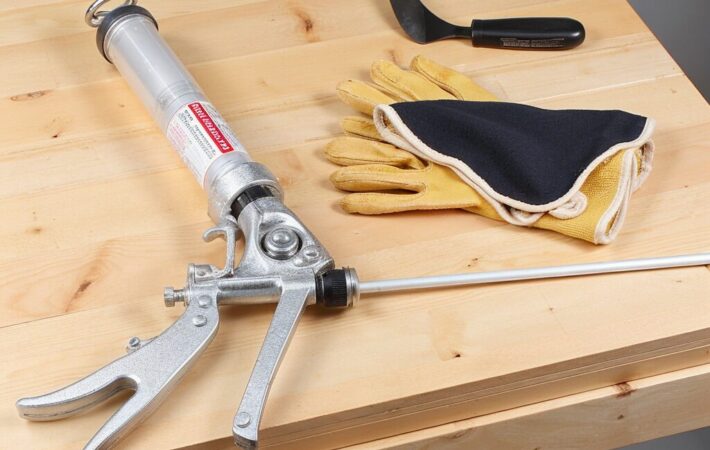
- Use a high-quality caulking gun for even flow.
- Apply a consistent bead along the joint or seam.
3. Smooth and Finish
- Use a caulking tool or damp finger to smooth the bead.
- Work quickly before the sealant begins to cure.
4. Allow Proper Curing Time
- Follow the manufacturer’s instructions—typically 24 to 48 hours.
- Avoid moisture, stress, or physical contact during this period.
Common Mistakes to Avoid
1. Skipping Surface Preparation
- Problem: Dirt and grease reduce adhesion.
- Solution: Clean thoroughly with rubbing alcohol or acetone.
2. Using the Wrong Sealant
- Problem: Standard silicone fails in high-moisture or UV-exposed areas.
- Solution: Use waterproof or UV-resistant sealants as needed.
3. Rushing the Application
- Problem: Uneven beads or incomplete coverage.
- Solution: Work in small sections for precision.
FAQs About Silicone Sealants
No, silicone sealants are not paintable. Use an acrylic or hybrid sealant for a painted finish.
High-quality silicone sealants can last 10–20 years with proper application and maintenance.
Use a silicone remover or a utility knife to scrape off residue, then clean the surface with rubbing alcohol.
🔗 External Link: For additional product advice, visit ToolStation’s Sealant Buying Guide.
Tips for Maintaining Silicone Sealants
- Regular Cleaning: Clean sealant lines with mild soap and water to prevent dirt buildup and mold growth.
- Inspect Regularly: Check for cracks, discoloration, or peeling, especially in outdoor applications.
- Reapply When Necessary: Remove failing sealant entirely before applying a fresh layer.
Conclusion
Silicone sealants are indispensable for projects ranging from waterproofing bathrooms to sealing outdoor windows. By choosing the right product, following proper application techniques, and maintaining the sealant over time, you can ensure long-lasting, professional results.
💡 CTA: Ready to get started? Browse our Silicone Sealant Collection for premium products designed to meet your project’s needs!


Leave a comment
Your email address will not be published. Required fields are marked *